Everybody likes to work with Mac OS X on a normal computer without buying the Mac Hardware. If you are one of them, you reached the correct place. This article explains how to install Mac OS X 10.5.5 Leopard on VirtualBox. We do not need to buy any additional hardware or software for this purpose. This method is only for testing purpose. Do not use as a permanent and production solution.
Mac OS X 10.5.5 installation DVD is not required and this method will work with AMD and Intel processor X 86 computers as well.
If you like to try this VMware preinstalled image on VMware workstation, try this method which we published earlier.

I wanted to try the same Mac OS X image on VirtualBox but faced below two issues.
1) The VMware Image did not boot.
2) Mac OS X admin password did not work once it booted.
I will be explaining how to fix the above issues and install properly in the below steps.
Note: This post originally published back in year 2010 with the older version of VirtualBox and macOS. If you have the latest computer hardware, VirtualBox and macOS, then you can find the updated guides in our this page.
Required Products for Mac OS X 10.5.5 installation.
- Oracle VirtualBox
- Mac OS X 10.5.5 VMware image
- Intel and AMD processor virtualization utility
Installation Steps
1) Download the Mac OS X VMware image here. ( it’s a torrent download & size is approx 1.9 GB)
2) Extract the downloaded image by WinRar.
3) Now, Open VirtualBox. Create a new virtual machine with the following configuration.
Operating System – BSD
Version – FreeBSD

MotherBoard Extended Features – Select Enable IO APIC,

Processor Extended Features –Select Enable PAE/NX

Acceleration Hardware Virtualization – Select Enable VT-x/AMD-V

If you can’t see Acceleration tab under system settings, it means hardware virtualization is not enabled on motherboard BIOS. This Mac OS X VMware image works only with hardware virtualization enabled computers.
Allocate memory – Minimum 1GB
Hard disk – Select Existing hard disk and add extracted Mac OS X VMDK file. You can see the hard disk size as 30GB. When adding the Mac VMDK file, attach as ICH6 or PIIX4 only. If you select PIIX3, Mac will hang with booting screen.

Read more here how to add vmdk files in VirtualBox as a hard disk.
4) Here we go; we are ready to start Mac 10.5 VM. Don’t start the virtual machine, because it will not work now. After configured following settings, close VirtualBox application completely and change the XML file. Add the string mentioned in the below step.
5) VirtualBox creates and saves virtual machine’s configurations in an XML file. Normally location is user profile ->.Virtualbox -> machines -> machine name.
Edit the XML file and add
<ExtraDataItem name=”VBoxInternal2/SupportExtHwProfile” value=”on” />
My Mac OS X XML file looks like below,
If you are facing difficulty to start Mac OS X after above changes, open the XML file and make sure the added line exists. Because sometimes when the VirtualBox services are running, the XML change will not be saved properly.
6) If the Mac OS virtual machine booting screen stuck as below, I’m sure something wrong with hardware virtualization.

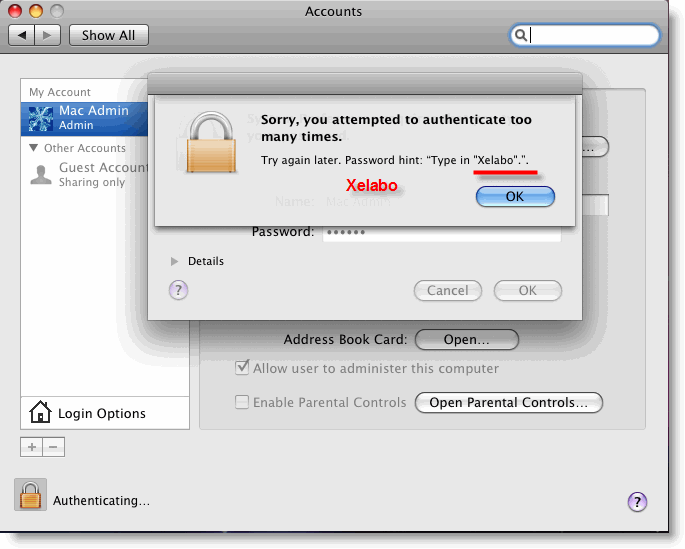
7) Mac admin password with for Mac OS X Vmware image is Xelabo, as hinted below.

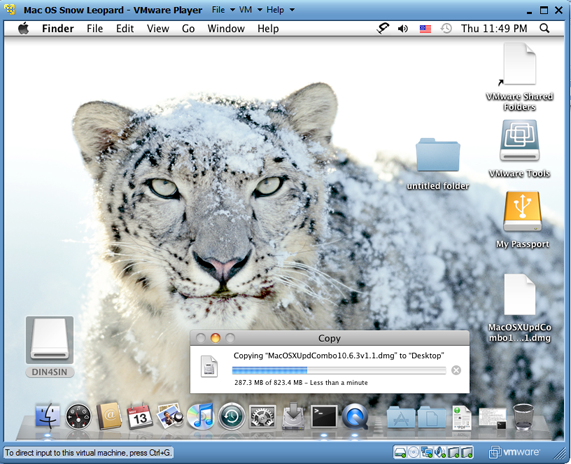
8) Now start the virtual machine, I’m sure you can see a working Mac OS X 10.5.5 leopard on VirtualBox.
9) As you could see in the above screen, the network is working fine within the image. I can ping to my host Windows computer from Mac OS X. I set up ‘Host-only’ network.
To use this method, the hardware virtualization in BIOS and Acceleration Hardware Virtualization – Enable VT-x/AMD-V in VirtualBox should be enabled.
You can verify the enabled hardware virtualization in motherboard BIOS here.
That’s it. Installation is done. Unfortunately, we can’t install the VirtualBox guest additions or change the screen resolutions.
Problems and Solutions
I demonstrated these installation steps on my PC which was with the following configuration (Remember: it was done in 2010).
- Intel Core2duo 2.66GHz
- 3GB RAM
- P35 Intel Chipset.
If the VM stuck with Mac logo (without loading arrows), then check the following settings.
- Enable IO APIC and VT-x
- Enable PAE/NX, make processors numbers 1
- You can Try Enabling Nested Paging. (it worked for me without enabling it, but one user said it worked for him after enabled)
- IDE Controller ICH6
- Close VirtualBox completely and open the XML file to make sure extra string is there.
- Still, it hangs? Shutdown the virtual machine and restart several times. It will work (Don’t ask me why).
If stuck with Mac logo (with loading arrows), then check the following settings
- Enable VT-x
- Check BIOS whether hardware virtualization is enabled.
- Run virtualization detecting tools to make sure that host OS is detecting hardware virtualization. Because in some PCs, even when VT is enabled in BIOS the OS will not detect.
- Close VirtualBox completely and check the XML.
As this guide was done with the older versions, you can use the same VMware preinstalled image of Mac OS 10.5.5 without modifying ting the XML file on latest Oracle VirtualBox. It is better to virtualize and use the latest version of macOS rather than trying 10-year-old product except you have some specific reason for that.


Well, using VMware Player 3.0.1 and the same file mentioned above ( Mac OS X VMware Image ) I’m able to boot Mac flawlessly. It’s a bit sluggish but it does work indeed. I guess it must have something to do with VirtualBox in the end.
John, Thanks for your try. You know what? To run this image on VMware, hardware virtualization should be disabled. To run on VirtualBox, hardware virtualization should be enabled, otherwise it will hang with Mac logo loading screen. If you can run on VMware Player without any issues, it means VT is disabled.
Too bad, cauz I wanted to use VMWare instead… but i dont want to switch VT off.
Any other reasons, why the OSX hangs at Apple logo?
I get the stuck on logo screen. I checked bios and it said hardware visualization is on. i have all options matching in descriptions but it still hangs =/
@ Dinesh
I ran the lot using VirtualBox with virtualization turned on so it must be something else.
Hey, I’ve been having some problems with this, and will get stuck on the loading screen forever. I have a new i7 processor, so it does have virtualization technology. I tried the VMware and it also did not work. Anyone have any idea what’s up?
Why is the VDMK image needed cloaked in this ridiculous file format. just use a .tar.bz2 for gods’ sakes!
@Dinesh
thx for creating this great tutorial
i have 2 probs
1: the sound in mac does not detect
2: how to change the resolution?
I tried this today. No luck sadly.
Host is a 2GHz Dual Core “Centrino Duo” running XP, with 2GB RAM (800MB in use at time of test.)
Boot hangs at apple logo.
Interestingly, in device manager, the 1GB of RAM assigned to the VM is not taken.
Using VirtualBox 3.1.6
I published a post about increasing Mac Virtual Machines Screen resolution. It works well. Now you have option to increase screen resolution. Enjoy. Visit here https://sysprobs.com/increase-mac-os-virtual-machine-screen-resolution-virtualbox-vmware-player
Thanks for the tutorial.
I followed all the instructions (twice too make sure). Both times it does not go beyond the Apple Logo screen 🙁
Are you sure the instructions are complete? I do not see many people respond that it works for them.
My solution to the Apple logo freezing on bootup in VirtualBox was to turn on “Enable Nested Paging”. Once I did that, it booted.
tried to run ” MacOSX Snow leopard 10.6.2.0 for VmWare” on virtualbox 3.2 bet. After disabling “enable efi” it starts but hangs on http://www.ubuntu-pics.de/bild/56877/osx__running____oracle_vm_virtualbox_006_BWuwtG.png
This post has been updated with some solutions. It may help you to run Mac OS X 10.5.5 on Sun VirtualBox.
Still no luck 🙁 Oh well, will wait for the new BETA of VirtualBox to be public.
Correction: After checking and fiddling for the umpteenth time I got it to go on PIIX4, 3D Video Accelleration on, nested paging off. Perhaps it’s just luck of the draw when it works 🙂
It does take about 10 boot attempts, so just keep trying. Then rather than shutting it down just close the window to save it; thereby avoiding 10 more attempts…
Hello Dinesh.
Thank you for this tutorial. It works fine except my network connection.
The network shows ““Cable Unplugged” message.”. I tried Host-Only & Bridge Adapter, both showed the same message.
Do you have any idea how to solve this problem???
This was a very Simple and Fast Tutorial. Everything Works Perfectly Except the Network Connection.
Could someone please post an image of their Configuration for a Running Network.
Much Appreciated,
– Alex
My network wouldn’t work on NAT, but worked fine on Bridged.
Got it working on an Athlon 64×2 laptop.
No sound nor network… yet.
NAT not working, Bridged, OS X detects the connection, but no internet or network access. Any ideas?
same issue with network connectivity. NAT or Bridged, doesn’t seem to work, unless I am doing it wrong.
Also, can’t seem to get some of my USB peripherals recognized (ie…external hard drive)
Run with -v and it always crashes when the login application launches. Any ideas?
Intel core2 Quad, 8GB, P35 chipset
Correction: That should be – Login Window Application.
Why dont you just upload the final VirtualBox file insteat of the VM image? That would made everybody very happy!
Thanks
Aaron
I have the same problem as Vambo