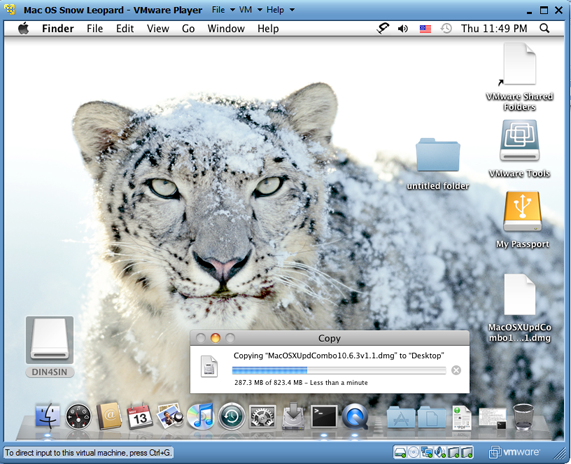
Everybody likes to work with Mac OS X on a normal computer without buying the Mac Hardware. If you are one of them, you reached the correct place. This article explains how to install Mac OS X 10.5.5 Leopard on VirtualBox. We do not need to buy any additional hardware or software for this purpose. This method is only for testing purpose. Do not use as a permanent and production solution.
Mac OS X 10.5.5 installation DVD is not required and this method will work with AMD and Intel processor X 86 computers as well.
If you like to try this VMware preinstalled image on VMware workstation, try this method which we published earlier.

I wanted to try the same Mac OS X image on VirtualBox but faced below two issues.
1) The VMware Image did not boot.
2) Mac OS X admin password did not work once it booted.
I will be explaining how to fix the above issues and install properly in the below steps.
Note: This post originally published back in year 2010 with the older version of VirtualBox and macOS. If you have the latest computer hardware, VirtualBox and macOS, then you can find the updated guides in our this page.
Required Products for Mac OS X 10.5.5 installation.
- Oracle VirtualBox
- Mac OS X 10.5.5 VMware image
- Intel and AMD processor virtualization utility
Installation Steps
1) Download the Mac OS X VMware image here. ( it’s a torrent download & size is approx 1.9 GB)
2) Extract the downloaded image by WinRar.
3) Now, Open VirtualBox. Create a new virtual machine with the following configuration.
Operating System – BSD
Version – FreeBSD

MotherBoard Extended Features – Select Enable IO APIC,

Processor Extended Features –Select Enable PAE/NX

Acceleration Hardware Virtualization – Select Enable VT-x/AMD-V

If you can’t see Acceleration tab under system settings, it means hardware virtualization is not enabled on motherboard BIOS. This Mac OS X VMware image works only with hardware virtualization enabled computers.
Allocate memory – Minimum 1GB
Hard disk – Select Existing hard disk and add extracted Mac OS X VMDK file. You can see the hard disk size as 30GB. When adding the Mac VMDK file, attach as ICH6 or PIIX4 only. If you select PIIX3, Mac will hang with booting screen.

Read more here how to add vmdk files in VirtualBox as a hard disk.
4) Here we go; we are ready to start Mac 10.5 VM. Don’t start the virtual machine, because it will not work now. After configured following settings, close VirtualBox application completely and change the XML file. Add the string mentioned in the below step.
5) VirtualBox creates and saves virtual machine’s configurations in an XML file. Normally location is user profile ->.Virtualbox -> machines -> machine name.
Edit the XML file and add
<ExtraDataItem name=”VBoxInternal2/SupportExtHwProfile” value=”on” />
My Mac OS X XML file looks like below,
If you are facing difficulty to start Mac OS X after above changes, open the XML file and make sure the added line exists. Because sometimes when the VirtualBox services are running, the XML change will not be saved properly.
6) If the Mac OS virtual machine booting screen stuck as below, I’m sure something wrong with hardware virtualization.

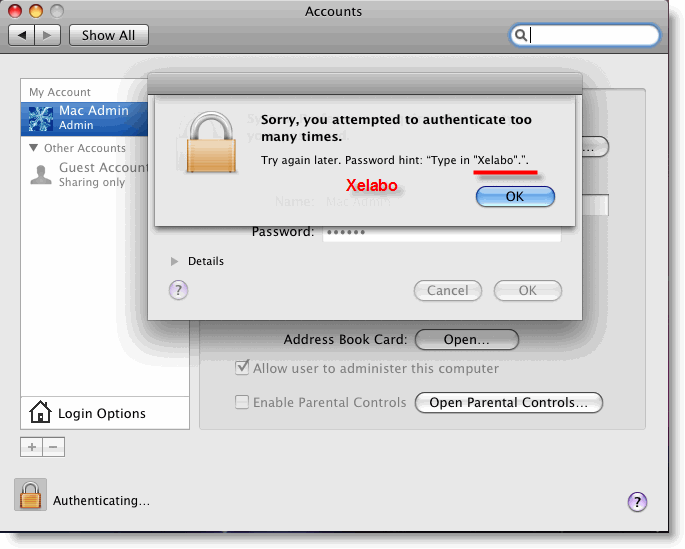
7) Mac admin password with for Mac OS X Vmware image is Xelabo, as hinted below.

8) Now start the virtual machine, I’m sure you can see a working Mac OS X 10.5.5 leopard on VirtualBox.
9) As you could see in the above screen, the network is working fine within the image. I can ping to my host Windows computer from Mac OS X. I set up ‘Host-only’ network.
To use this method, the hardware virtualization in BIOS and Acceleration Hardware Virtualization – Enable VT-x/AMD-V in VirtualBox should be enabled.
You can verify the enabled hardware virtualization in motherboard BIOS here.
That’s it. Installation is done. Unfortunately, we can’t install the VirtualBox guest additions or change the screen resolutions.
Problems and Solutions
I demonstrated these installation steps on my PC which was with the following configuration (Remember: it was done in 2010).
- Intel Core2duo 2.66GHz
- 3GB RAM
- P35 Intel Chipset.
If the VM stuck with Mac logo (without loading arrows), then check the following settings.
- Enable IO APIC and VT-x
- Enable PAE/NX, make processors numbers 1
- You can Try Enabling Nested Paging. (it worked for me without enabling it, but one user said it worked for him after enabled)
- IDE Controller ICH6
- Close VirtualBox completely and open the XML file to make sure extra string is there.
- Still, it hangs? Shutdown the virtual machine and restart several times. It will work (Don’t ask me why).
If stuck with Mac logo (with loading arrows), then check the following settings
- Enable VT-x
- Check BIOS whether hardware virtualization is enabled.
- Run virtualization detecting tools to make sure that host OS is detecting hardware virtualization. Because in some PCs, even when VT is enabled in BIOS the OS will not detect.
- Close VirtualBox completely and check the XML.
As this guide was done with the older versions, you can use the same VMware preinstalled image of Mac OS 10.5.5 without modifying ting the XML file on latest Oracle VirtualBox. It is better to virtualize and use the latest version of macOS rather than trying 10-year-old product except you have some specific reason for that.


Wow! I have never tried Mac in my life! Thanks a lot bro! i’ll surely try this! 😀
Yeah, this is good to try in PC, just to see Mac
After following all instructions and when I started MacOSX in virtual box I got the following error:
FATAL: INT18: BOOT FAILURE
so what do you think is the problem
note: I did edit the XML file
Nick
It did work for me.
I did not managed to install the VMWare Converter, cannot launch the installer for some reasons, but using the original Mac OS X Leopard.vmdk I could become root (administrator) in terminal:
sudo su
and using the following password: Xelabo
Thanks for the admin Password hint. It will save lot of time for us.
VirtualBox 3.16
WinXP
Intel Duo Core 3GHz
Done every steps but couldn’t boot, it keeps loading…and loading.
any idea?
I’m running it on VB 3.16 WinXP as well.
Sometimes the VM is just loading loading as well for me.
I manage to run it by using the boot option: -v
If it does not work on first time, switch off the VM and start it again.
thanks, Quoc-Huy,
but doesn’t work, i have tried use the VM without converted and the converted one, both are just keep loading.
obviously it works on VMWare, but i have tried to update the OSX to the latest one and it crashed after updated.. anyone has tried that?
I can’t find the option in settings for Acceleration Hardware Virtualization. I am using Version 3.1.6 of VirtualBox on Windows 7.
If you can’t find Acceleration Hardware Virtualization option, it means Hardware Virtualization is not enabled on your mother board or not supported. Check out in the motherboard BIOS.
After specifying:
In my Leopard config file (between the tags), I then receive this message and am unable to launch / edit the VM:
[quote]Input is not proper UTF-8, indicate encoding !
Bytes: 0x94 0x56 0x42 0x6F.
Location: ‘C:UsersRHF.VirtualBoxMachinesLeopardLeopard.xml’, line 14 (0), column 20.
D:tinderboxwin-3.1srcVBoxMainMachineImpl.cpp[5838] (Machine::loadSettings).
Result Code:
E_FAIL (0x80004005)
Component:
VirtualBox
Interface:
IVirtualBox {2158464a-f706-414b-a8c4-fb589dfc6b62}[/quote]
If I remove the line, I can then edit/launch the VM, although as far as I’ve managed to get is just the apple logo on the boot screen (no guru meditations mind you!).
Host: Lenovo T61 (Core2Duo 2ghz, 4gb ram, win 7 x64).
Anyone have any ideas?
!ExtraDataItem name=”VBoxInternal2/SupportExtHwProfile” value=”on”/!
^ your site ate up the <ExtraDataItem! tag! ^ the above is supposed to be spaced on the line above
I followed your instructions but after booting I can see Apple logo and the system halted on it.
I can’t install Mac OSx86 on my PC!
Unfortunately my motherboard doesn’t support the virtualization!
However, I can run it on VMware!!!!
sound drive is not available!
by the way, what is the password for this OS? User name = Mac Admin and the pass???
if you are using this image in VMware, then try ‘ password ‘ as Mac Admin password
This Post has been updated. So, it may solve some issued raised in comments. Feel free to come back.
Thanks for this. I managed to get OSX guest working in vbox on an OSX host. One thing to watch out for is the ExtraDataItem you need to add to the XML file.
If you copy the line from your article you’ll notice that the quotation marks are not the correct ones. They are ” instead of “.
Here’s the correct line:
Also watch out for the character encoding of the file. When I made the changes using TextEdit it messed up the encoding. I found it best to use nano via a terminal session.
Ah. Predictably the blog software has mangled my posting, changing the quotation marks to the wrong ones and leaving out the correctly formatted ExtraDataItem line.
So, just copy the one above and over-write the quotation marks with normal ones.
Has anyone tried to use the Software Updater? After I installed, it says: “You need to restart your computer. Hold down the Power button for several seconds or press the Restart button.”
Just continues to do so after I try to restart. Any ideas?
Friends, apologize for quoting error on ExtraDataItem name value. Somehow blogging software changed it automatically. I’m sure you can guess which one is correct. Thanks for people who mentioned this.
Roger,
I haven’t try update yet. But manual update for same image in VMware Player works fine as per one user. You can check a comment by Crunch in this post,
https://sysprobs.com/run-mac-os-pc-free-easy-vmware-player-3
i did every set up same as above instruction but it’s just running apple logo, waited about 40 minute but still same.
hardware – support virtualization (ASUS P5Q-E)
OS – windows 7 x64
Memory – 8GB (DDR2 800)
Video card – ATi Radeon HD 2400pro
Please let me know if i need to do somthing else to make it work.
Thanks for your help.
Dinesh –
I tried both the Software Updater and the manual method (downloading the full update from apple.com/support) for 10.5.8. Fails the same. Can’t utilize much without those updates …iTunes, Safari latest version, etc. Thanks anyways!
Thank you so much
it is working over the top …
This took me a while, but if you’ve checked floppy (is default on) and you have no floppy on your computer, OSX will not start.
also stuck at the running apple logo…
🙁
Hello Dinesh.
Thank you very much for this tutorial. It’s my first time using MAC. It works fine except my network connection.
I did all the steps you said and I still have a “Cable Unplugged” message.
Do you have any idea how to solve this problem???
Thank you in advance!!!
Too bad, yet another one stuck at the Apple logo spinning to no avail …