


Picture a birthday dinner. Someone films a few seconds of everyone singing around the table, with just one lamp on, so the room is a bit dark. On the phone the clip looks okay. Then it lands in the family WhatsApp group and the first reply is, “why is it so blurry?” Fair question. Faces look soft, the cake is just a pale shape, and the banner on the wall can’t be read at all.
Most people blame the phone camera. Honestly, the camera is only half of it. So here’s what really makes phone videos go soft, how an AI tool fixes that, and how one did on a dim evening clip.
Why Phone Videos Look Soft
There are three usual suspects, and they often pile on top of each other.
Low light. When the room is dark, your phone pushes its sensor harder so the picture doesn’t come out black. The catch is grain, lots of tiny speckles. So the phone tries to clean those up on its own, and it isn’t picky about it. Hair, the weave of a shirt and small writing get wiped out along with the speckles.
Messaging compression. A lot of people don’t know this one. WhatsApp shrinks your video before sending it. Makes sense, nobody wants a 50 MB file eating their data. But to make it smaller, it throws stuff out. And what goes first is the bits that move, plus anything with fine texture. Hair. A checked shirt. That kind of thing.
Repeated exports. You cut a few seconds off in one app, save it, then someone forwards it to another group. Each step squashes the video a little more. Once, you won’t see it. Four or five times later, it’s a mess.
Simple Resize vs AI Enhancement
It helps to know what “making a video HD” really means, because two very different things go by the same name.
A normal resize just stretches the video. Your 720p clip turns into a 1080p file, sure, but there’s nothing new in it. It’s the same picture, only bigger, and edges can even look a bit mushier, because the software has to guess the colour of all those extra pixels by blending the ones next to them.
AI enhancement works differently. These tools have been trained on tons of video, so they know what a sharp edge or a clean patch of skin should look like. They use that to tidy up the blur, the grain and those ugly blocky squares you get from compression. The result looks a lot better than a plain resize, and it still looks like your clip, just cleaner.
The Tool Used
That’s the gap Wink is built to close. It comes from Meitu and handles both photos and videos, and you can use it in a browser, as a phone app or on desktop, whichever is handy. Same account works on a phone browser and a laptop, so you can start a job on one and finish it on the other.
There’s a bunch of tools in there, like a video enhancer, a denoiser, and frame interpolation if you want smoother motion. For a soft phone clip, though, the HD converter is the one to reach for. It upscales to 1080p, 2K, 4K or 8K, cleaning up grain and blur on the way.

Wink’s HD video converter page, where the upload starts.
Hands-On: Converting an Evening Clip
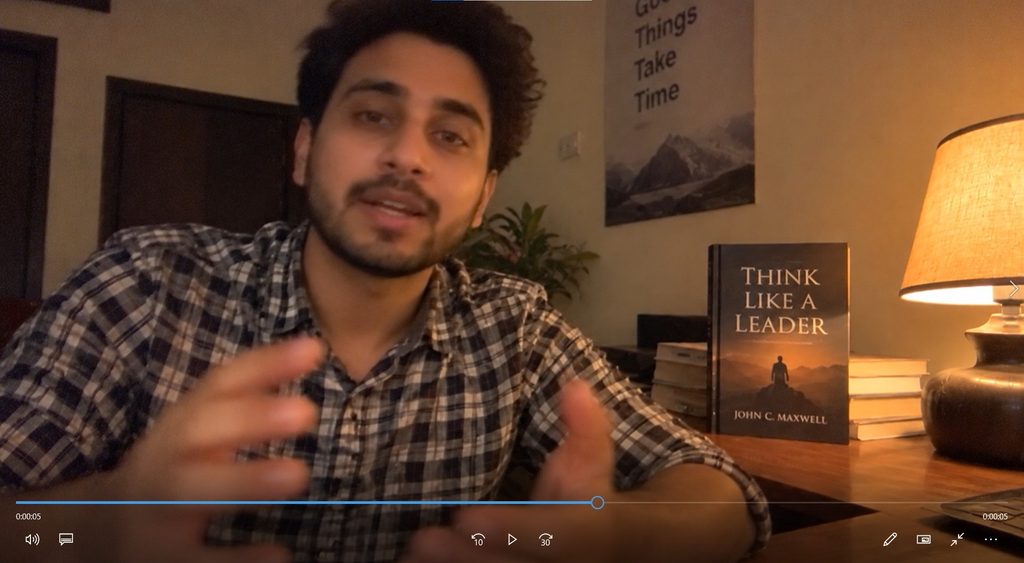
The test clip is a short 720p video, just 10 seconds long. It’s a guy in a checked shirt sitting at a desk, talking with his hands. The only light is a table lamp. Behind him there’s a book standing up and a poster on the wall, both with writing on them. It’s a pretty typical phone clip, and hair, a checked shirt and small text are exactly what tend to go soft when the light is low, so all three are in the frame.
Here’s how it works. Open Wink’s HD video converter in your phone’s browser (this test used Chrome on a Samsung Galaxy A54) and upload the clip, no app install needed. Tip: upload the original from your gallery, not a copy saved back from a chat app. Wink then shows four options, 1080p HD, 2K UHD, 4K Ultimate and 8K Master. Pick 1080p if the clip is mostly going to be watched and shared on phones.

Wink’s quality levels after the upload, with 1080p HD selected.
The conversion here ran on a laptop, signed in to the same account. No sliders to adjust. Wink looked at the clip, chose the settings itself, and about 5 seconds later it was done. The 1.01 MB, 1280×720 original came back at a full 1920×1080. Play it once in the browser, then save it.
Comparing the Results
Both versions were stopped on the same frame, compared with Wink’s slider dragged back and forth, and then watched at normal speed.
Hair: you can now see more of the curls on top, and the beard edge is cleaner.
Fabric: not a bit of smearing or wobble in the checks, and near the collar the squares are nice and sharp.
Movement: there’s just a little camera movement, and it plays back smooth. No flicker, no smearing.
Text: the book title and the poster both read clearly now, crisp letters and all.
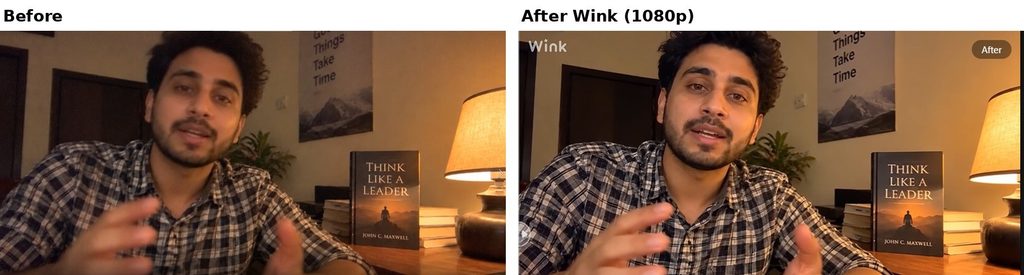
The same frame before and after Wink’s 1080p upscale.
On a phone, the Wink one just looked cleaner. His face and the shirt popped more, and it didn’t feel like a clip shot in a dim room anymore.
Before You Hit Send
Two or three small habits stop that sharpness from getting lost on the way. Hang on to the original and edit a copy. Sending to a group chat? 1080p does the job fine. Tap the HD button in WhatsApp when you send, or share a Drive link, and the app won’t squash it again. Next time you’re filming, get a bit more light in and give the lens a quick wipe on your sleeve. Both help a lot.
Final Thoughts
So, a blurry phone video is usually low light, compression and one save too many, all piled together. In this case the soft 10-second clip went into Wink and, about 5 seconds later, came back as a clean 1080p file. Hair sharper, shirt crisper, text clearer. If there’s a clip on your phone you never sent because it was too fuzzy, give a copy a run through Wink and take a look.
