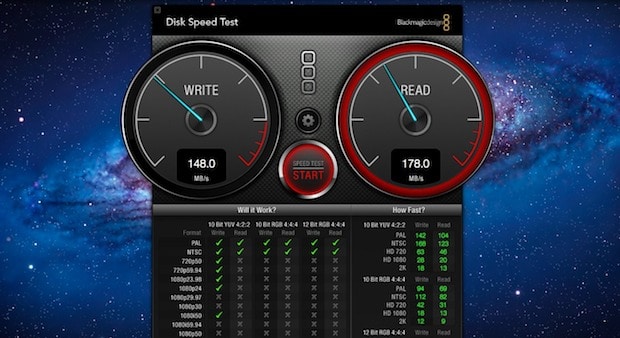
I prioritize SSDs for personal computers such as laptops and desktops. I believe that they truly boost the performance of a computer, creating an immense difference from the traditional mechanical hard disk. Even with the same processor and RAM size, changing the hard disk from normal HDD to SSD on the same computer will greatly help.
It is possible to tell the difference between an HDD and an SSD while using the computer, but how do you measure the speed improvement when you switch your computer to an SSD? Here are the ways to check SSD speed in Windows 11/10 and 8.1/7.
When it comes to checking the performance of SSD or NVMe, we need to check the disk’s data writing and reading speed. How fast can it write and read a specific data size under certain conditions? Many tools with extra parameters and configurations are available to check the SSD speed, but for everyday home or business users, the CrystelDisk tool is the best option.

Why Check SSD Speed in Windows 11/10?
Checking the speed of your SSD (Solid State Drive) is important for several reasons. The main reason is to ensure your laptop/desktop SSD is performing at its optimal level because it can become slow due to various factors such as fragmentation, a high number of files, or installation of lots of programs and temp data without proper maintenance.
Also, checking the SSD speed can help you compare the other SSD devices in the market if you are a techy person. If the model you are using does not give the recommended output, then you can optimize or upgrade other hardware (such as cables and ports) to get the optimal SSD speed.
Ways to Check the SSD/NVMe Speed in Windows 10/11
- Use the Built-in utility – It can do the basic testing of the SSD or any hard disk. But, we will not have any extra options/settings.
- Use the third-party tools – A few dedicated disk speed test tools can do the job well with several options/inputs.
Check the SSD Speed in Command Prompt or PowerShell
We can use the Windows built-in system check tool to identify the disk read and write speed.
You must have administrative access on the PC to perform the below task.
Open the command prompt or PowerShell with the ‘Run as Administrator’ option and type the below command.
winsat disk
This will check the system’s main disk (mostly the C drive).
My main disk is SSD, so I got the below speed results.

If you have more than one disk, you need to enter the below command to find the other SSD speed.
For example, I have another drive/partition called D from a regular hard disk.
winsat disk -drive d

As expected, the normal hard disk’s read/write speed is way less than the SSD.
Using Third-party Tools to Check SSD Speed on Windows 11/10/8.1
Several popular disk benchmarking tools are available online, but my favorite is CrystalDiskMark. It is a lightweight free tool. It also provides detailed information on the performance of different file sizes and queue depths.
If you want to compare the speed between your old and new SSD disk, you should do the first test on the same computer with the old hard disk, then do the following test on the new SSD disk with the same parameters/settings.
1) Download the CrystalDisk Mark standard from the official site. Somehow I like the standard version, which is simple and easy to use.

2) Launch the program after the installation.
You do not need to change much here except the partition you want to test. Mostly it will be the C drive with the OS and programs files. Leave the default 1GB data size to check the read/write speed. If you want to give more stress to the disk, increase the data size, which will take longer.

3. After all tests are over, you can see the results. To get a better result for comparison, I suggest closing all programs/files and not doing any activities on the computer while the test is running.
4. Here is the result of the SSD drive.

That is how simple it was to check the SSD speed in Windows 11/10 with the simple GUI tool.
Additional Third-party SSD Speed Benchmarking Software
AS SSD Benchmark:
This is another free and widely used tool that tests the sequential and random read/write speeds of your SSD. It also provides information on the access time and CPU usage during the test, which can help assess CPU/motherboard compatibility with the SSD.
Anvil’s Storage Utilities:
This comprehensive benchmarking software provides detailed information on the performance of your SSD, including sequential and random read/write speeds and IOPS (input/output operations per second).
PCMark 10:
It is a popular benchmarking software that provides a detailed performance test for your laptop/desktop computer, including SSDs. As it provides many other details about the PC, you may need to wait a bit longer to see the SSD speed test result.
Samsung Magician:
This is software specifically designed for Samsung SSDs, but it can also work with other brands. In addition to testing the speed of the hard disk, it can also provide details about temperature and firmware updates.
Compared to others, I find CrystalDiskMark one of the best and simple SSD benchmark tools to easily use on any laptop and desktop computer. Even in the server production environment, I used this tool to benchmark the SSD speed vs. HDD vs. NVMe once the physical or virtual servers are migrated to SSD storage. If you replaced your desktop or laptop computer hard disk from HDD to SSD, this tool could clearly show how much the data access speed improved (or dropped) after the changeover.
Checking the speed of your SSD is essential in maintaining optimal performance and ensuring that your computer runs at its best. The article discussed two methods for checking SSD speed: using Windows’ built-in tool using third-party benchmarking software.

