At the moment if you want to have Windows 11, you need to have an activated working Windows 10 on your physical or virtual computer. So, you can upgrade the existing OS with the insider preview Windows update. If you want to skip these steps or don’t want to try on your primary working Windows 10 computer, there is a way to download Windows 11 ISO file and install it on another physical computer or virtual machine on the same computer.
Once Microsoft releases the final version for the public, you do not need to follow the below steps to download Windows 11 ISO file. If you are eligible, you can download the final version from the Microsoft website itself which is highly recommended. This method is only applicable till Microsoft releases the ISO (or VHD) file officially. However, you can use the same steps any time at your own chance.
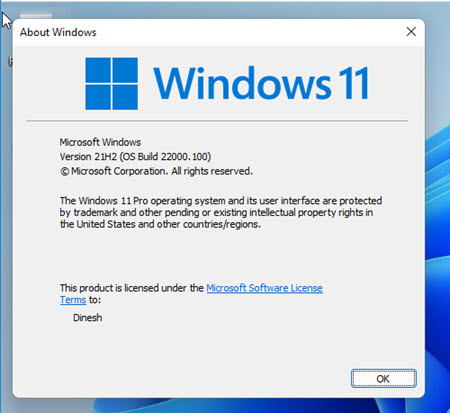
During the installation, we noticed that this Windows 11 ISO file could be installed on the Systems, which doesn’t have actual system requirements for Windows 11. For example, we could install it on a virtual machine without TPM 2.0 and Secure Boot support. The physical computer we used in this example to create Windows 11 virtual machine doesn’t have TPM 1.2 or 2.0 in the BIOS. But, the Windows 11 VM worked perfectly.
How to Download Windows 11 ISO file?
1) We can use uupdump.net website to download the Windows 11 ISO file. You can use the same website to download your favourite OS ISO files. The steps are identical for most Operating Systems.
2) Click on ‘Dev Channel’ or search for Windows 11. You will get several options here. Select the latest version for x64 architecture.

Click Next.
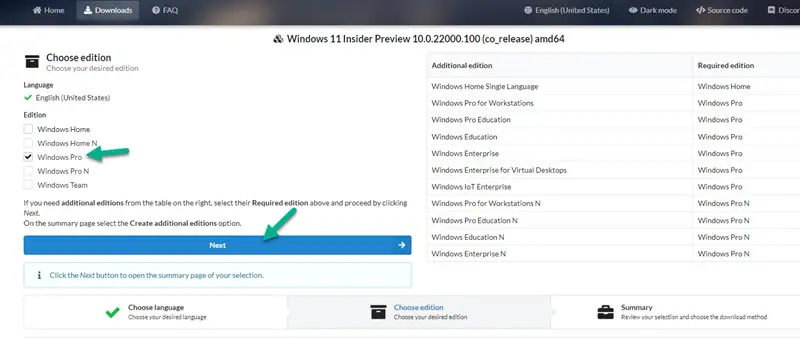
3) Select the Windows version you need to include in the download. I suggest picking only one version. Since we are doing this for testing and learning purposes, adding more versions may increase the download time. I selected the Pro version.
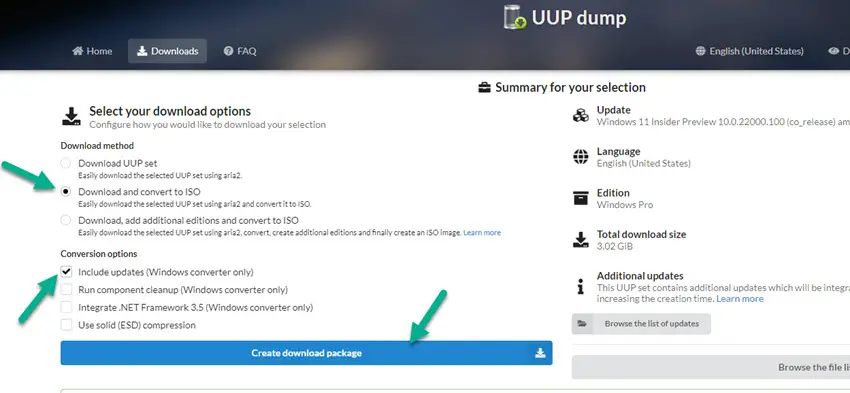
4) Select the ‘Download and convert to ISO’ with the ‘Include updates’ options as shown below. Click on Create download package. A small zip file will be downloaded. This is just the package of the Windows 11 ISO file that we need to execute to download the actual ISO.
5) Save the file on your computer. I noticed that the folder (or the folder path) where you are saving this ZIP file should not contain space in the name. If so, the download and extraction will throw an error. Also, make sure you have enough space at this location.
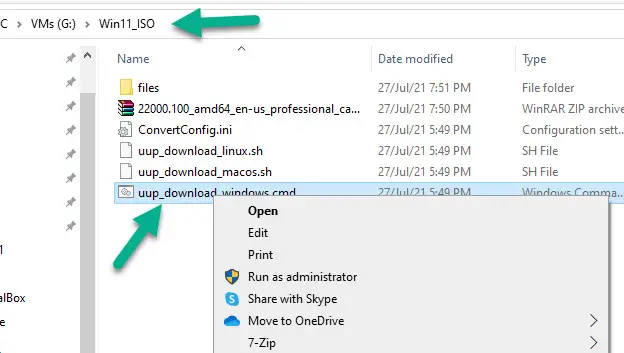
6) Once downloaded, extract the ZIP file. Then double click the ‘uup_download_windows.cmd’ file.
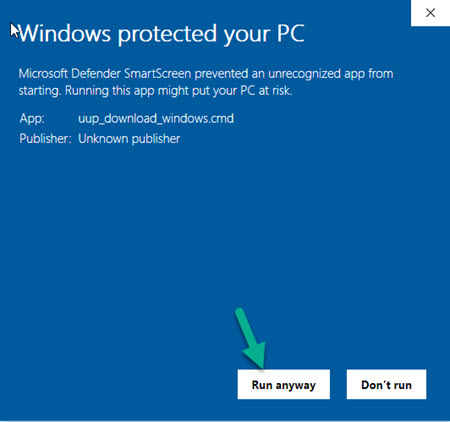
7) You may get the Windows warning message about ‘Unknown publisher‘. Click on more/advanced then select ‘Run anyway’.
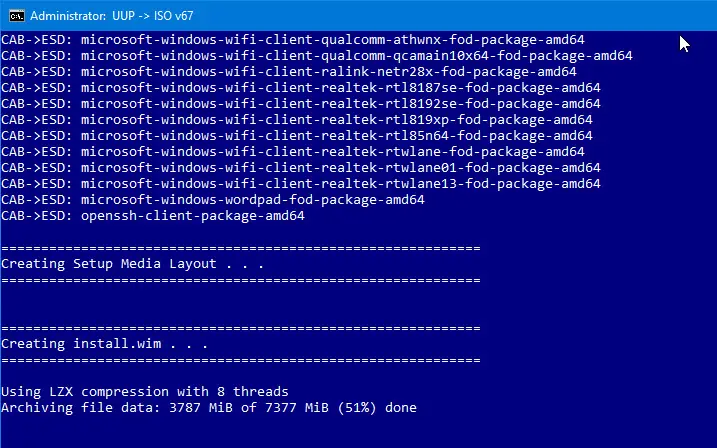
8) Depending on your internet speed, it will take some time to download the ISO file. Few scripts and commands will run and disappear. Do not bother. Wait patiently for confirmation.
9) Here is the confirmation of the successful download. Press 0 to exit the screen.
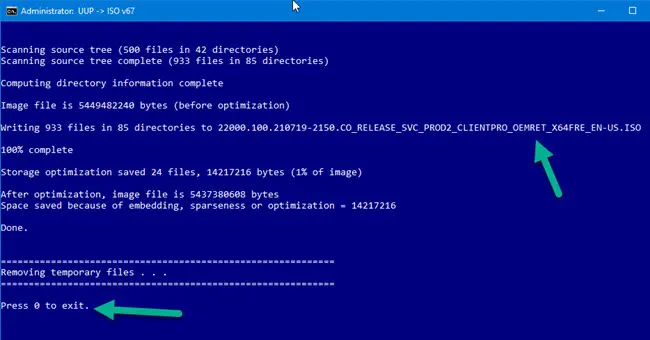
You will find a Windows 11 ISO file at the location where you executed the command.

We have successfully downloaded the Windows 11 ISO file. We can use the ISO file directly on virtualization software like VirtualBox, VMware or Hyper-V to boot the virtual machine and do a fresh installation.
If you are going to use this ISO file to boot a physical computer for installation, then you need to create a bootable USB by using Rufus or any other method.
Part 2: Install Windows 11 on VMware Player with ISO file (Fresh Installation)
1) Make sure you have the latest VMware workstation or free VMware player.
2) Open the software and create a new virtual machine.
3) Browse the Windows 11 ISO file you downloaded earlier. Since VMware doesn’t support Windows 11 officially (currently), we can ignore the below warning and continue the installation.
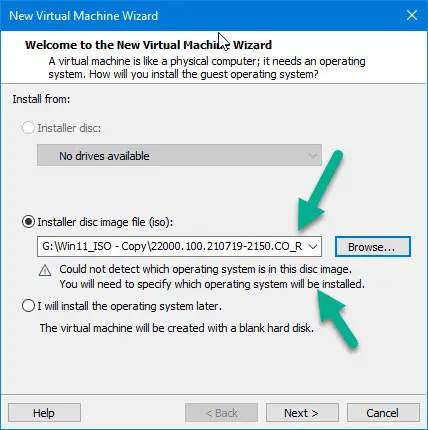
4) Select Windows 10 x64 as guest OS. By the time you read this guide, if VMware supports Windows 11 guest Operating Systems, then it can detect the guest OS automatically from the ISO file.
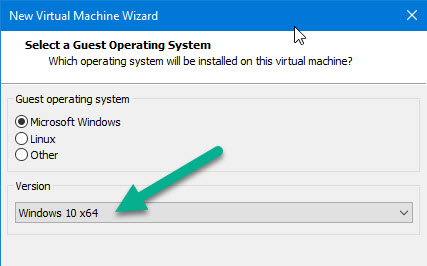
5) Provide a name for VM and allocate the disk space.
6) It is recommended to set 4GB RAM for the VM. If you don’t have enough RAM on the physical computer, try 2GB RAM. It should work with this ISO file. But remember, the official requirement for Windows 11 is 4GB RAM.
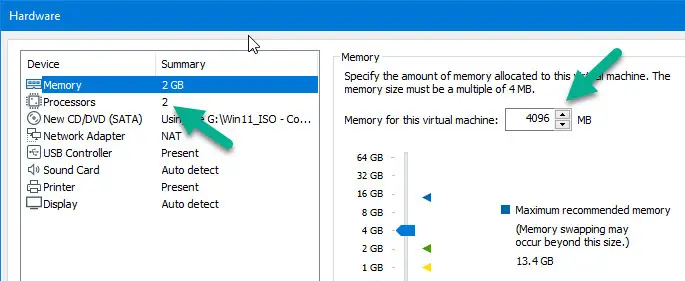
Increase the number of processor cores if your physical computer supports it.
7) Complete the creation of the VM and power it on now.
8) The installation process will begin smoothly. We are not talking about every step here. If you need more details, do check our earlier guide on installing Windows 11 on VirtualBox.
Note: Select the ‘I don’t have a product key’ option when it prompts the activation key.
There you go, you will get the fresh working Windows 11 virtual machine desktop on VMware now.
Let’s do further fine-tuning.
If you are using these steps on a VMware workstation, I suggest taking a snapshot of the VM at this point. Unfortunately, we can’t do that on the VMware player.
Install VMware Tools on Windows 11
We can use the existing Windows 10 VMware tools, and it works perfectly.
a) Click on the ‘Install Tools’ option at the bottom of the VM.

b) When the tools are loaded to the CD drive, browse the drive and execute the setup file to begin the VMware tools installation.
c) The process is simple. Reboot the VM once the installation is completed.
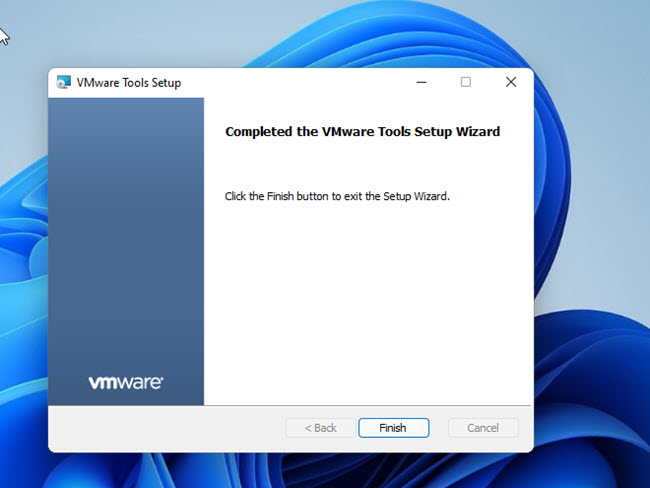
Now the full screen, different screen resolutions and unity mode in Windows 11 will work. Also, you will see the overall performance improvement inside the guest OS.

Some Pre-Checks on Windows 11 Guest VM
The Windows OS version shows correctly in ‘About Windows’, but the System Information can’t provide many details about the Operating System. I guess the VMware BIOS is not passing the proper details.
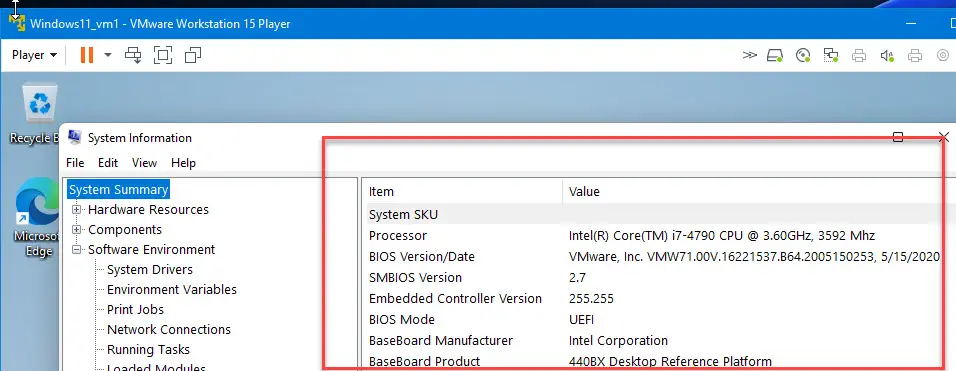
Is TPM 2.0 available inside the VM?
No, because my physical computer doesn’t have TPM 2.0 support. But, with this ISO file, I can install Windows 11 by using the VMware player without TPM 2.0 support.
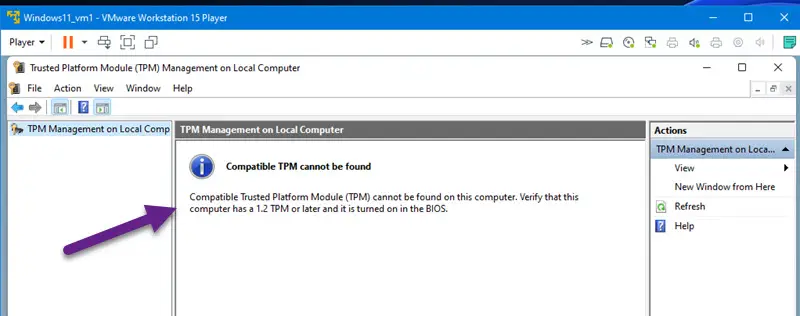
I suggest keeping Virtual Machine snapshots always. When you do a Windows update on this VM, the latest updates and major changes may crash the OS because of non-available TPM 2.0 & Secure boot. They are some of the critical system requirements for the final version of Windows 11.
Performance improvement.
I noticed an improvement in the VM once I enabled VT-x, IOMMU and other options with four processor cores. These settings should be done manually after creating the VM.





great job, explained that even a baby would understand