It is always advisable to install and test the new Operating Systems in the virtual platform before trying it in a live environment, especially the server version we use in production. In this guide, let me show the steps I followed to install Windows 2019 server LTSC and SAC versions on Oracle VirtualBox. The Windows 2019 server OS was built on the firm foundation of the earlier Windows 2016 server. Windows 2016 was the most popular and fastest adopted Windows server Operating System ever, and Microsoft expects the 2019 version to overtake it.
You can check here to learn more about what is new in Windows 2019. As a Windows server administrator or a learner, you would love the new features it brings up. The project Honolulu is something I’m incredibly interested in and happy to have.
Two Versions of Windows 2019
You must understand the significant difference between both Windows 2019 versions. I have shown how to install Semi-Annual Channel (SAC) and Long-Term Servicing Channel (LTSC) on VirtualBox with my Windows 10 computer. Find below the major differences between both versions.
1) Semi-Annual Channel (SAC)
- It gets feature updates from Microsoft twice a year. Your organization should have Software Assurance to be eligible for the upgrade.
- The Windows 2019 SAC doesn’t have GUI. So, it is like Windows Server Core or Nano installation. It is well secured and optimized, but management is not easy without GUI.
2) Long-Term Servicing Channel (LTSC)
- It is for organizations that prefer the more traditional release of feature updates in two to three years.
- It comes with both Server Core and Desktop Experience (GUI) versions.
Let’s dive into the installation of the Windows 2019 server on VirtualBox.
I already published a guide showing how to install Windows 2012 R2 on VirtualBox with a pre-installed VHD file from Microsoft. At the moment, Microsoft Provides ISO and VHD files of the Windows 2019 server on their official website.
To continue further, you must be able to download the Windows 2019 ISO file from the Microsoft Windows Insider Program website. It will help if you have a Windows live account that is part of the Insider program (Free to join). Here is the URL to download Windows 2019 server version for testing and demo installation purposes.
Windows 2019 Server VHDX on VirtualBox
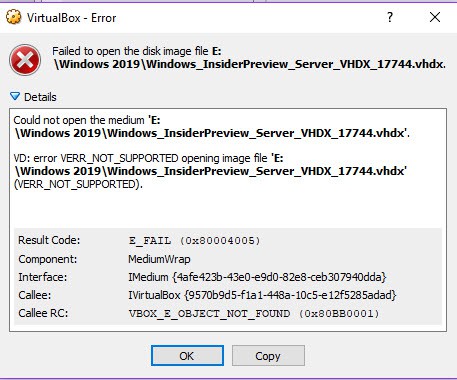
Unfortunately, I could not use the VHDX file of both Windows 2019 SAC and LTSC versions on the VirtualBox. VirtualBox was unable to read the VHDX file properly. Therefore it can’t be used to boot the virtual machine from it.
It threw the following error while attaching the VHDX, “Failed to open the disk image file..” with the “MediumWrap” “E_FAIL”. It is still doubtful whether VHDX is supported in VirtualBox for reading and writing access. It looks like it supports only read-only as of now. As you know, VHDX files are mainly made for Microsoft Hyper-V hypervisor.
VHDX to VHD
I used “vboxmanage clonemedium” command to convert the VHDX to VHD, and it succeeded and converted the Windows 2019 Server VHDX to VHD. Also, this time I managed to add the converted VHD disk to the new Virtual Machine. But it did not boot. It gave the error saying, “No Bootable medium found.” To reconfirm the readability of the converted VHD file, I attached the disk to another working Windows VM and managed to read the content on the VHD file. I’m yet to find the solution in mounting the preinstalled Windows 2019 Server VHDX on VirtualBox and see how it works.
At the moment, the final solution is to use the ISO file and do the fresh installation.
Read Also: Best Windows Home Server OS
Windows 2019 Semi-Annual Channel (SAC) on VirtualBox
It worked, but I’m not sure why you need to install a Server Core version in VirtualBox without Desktop experience. But for a full-fledged test lab setup, you can install it in multiple VMs to test the Windows 2019 server cluster and server farm feature.
I assume that you have already worked on the Server Core version. The installation is straightforward. Download the ISO file of Windows 2019 SAC from Microsoft and start installing.
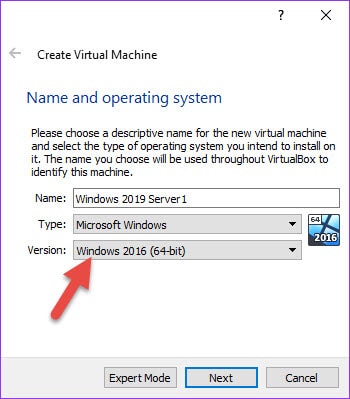
1. Select the Operating System as “Windows 2016” or Windows 2019 based on your Oracle VirtualBox version.
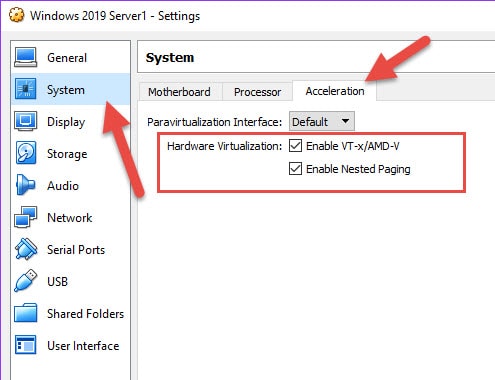
 2. Make sure that Processor settings remain the same as below. By default, when you select the Windows 2016 version, it sets automatically.
 3. Set the RAM; I allocated 4GB RAM and 50GB of new hard disk.
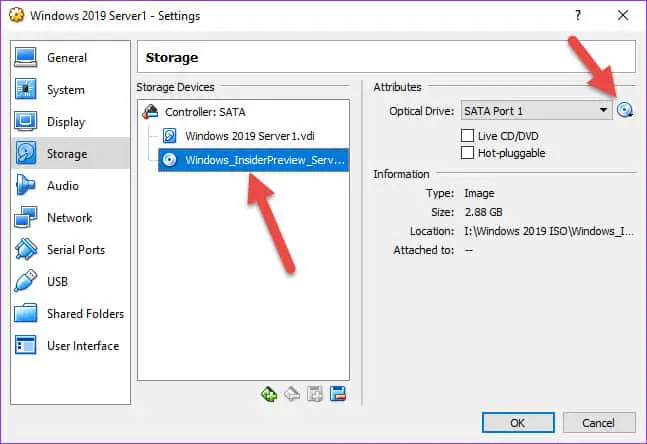
4. Attach the downloaded ISO and start the Virtual Machine.
 5. Select the “Standard” or “Data Center” versions to install. I selected the Data Center version and continued the installation.
6. Once installation is completed, you will get the first screen to set up an administrator account. It will be the server core version; you must play with the command prompt and PowerShell. Mouse and keyboard integration works fine.
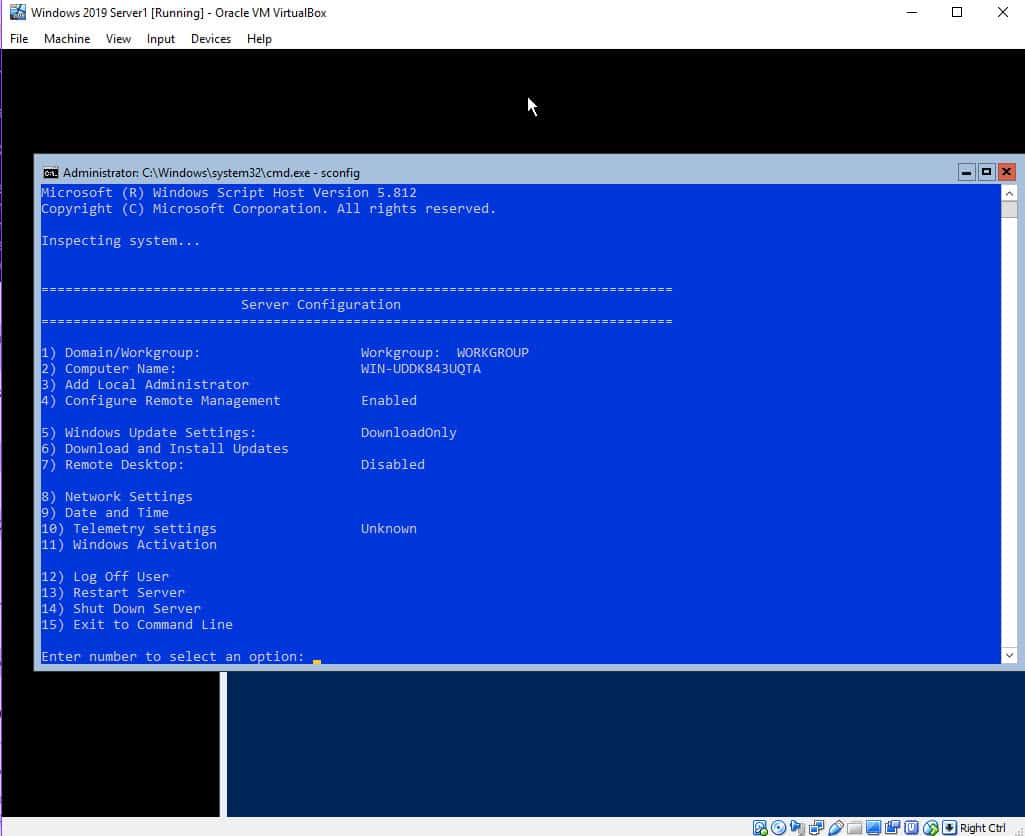
7. With the ‘sconfig’ command you can configure the Windows 2019 Core on VirtualBox.
 8. Network worked without installing VirtualBox additions inside VM (NAT type, it should work with any type including Bridged or Internal only).
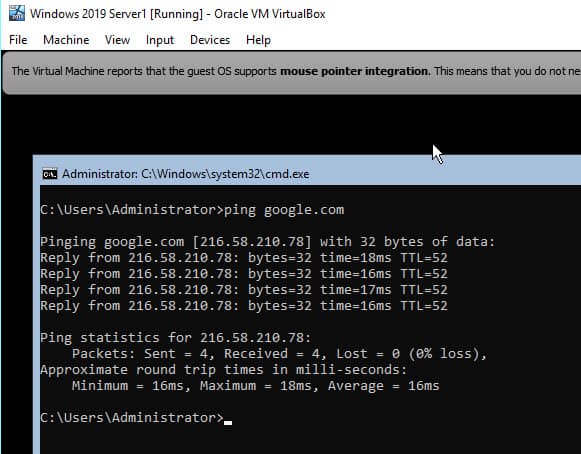
Since it doesn’t have a desktop graphical interface, we do not need to install guest additions on this Server Core.
Windows 2019 Long-Term Servicing Channel (LTSC) on VirtualBox
The LTSC version of Windows 2019 Standard and Datacenter have desktop experience GUI and core installation. Here I selected the Datacenter with the desktop experience.
9. The installation steps are the same as the SAC server mentioned earlier. Select the correct version you want to test with the Desktop experience as mentioned
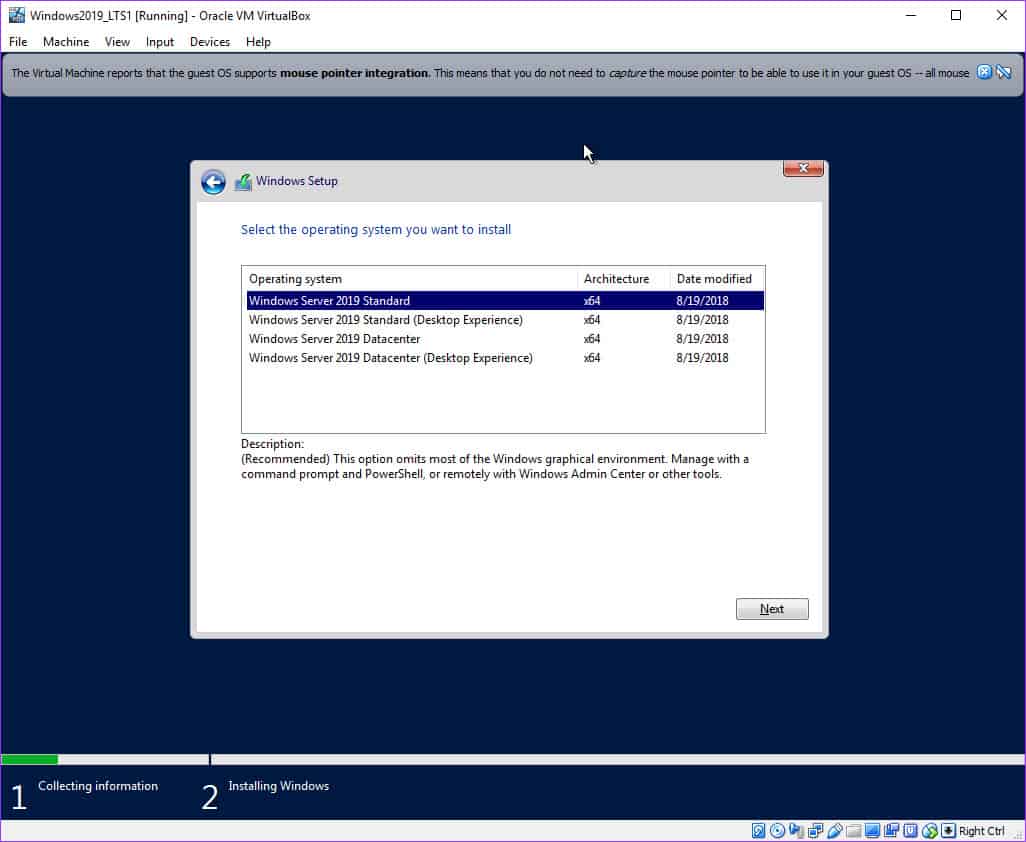 10. You can leave the OS key, enabling your evaluation period once the installation is completed. You need to set a new complex password for the Administrator account. You will land on the Windows 2019 server desktop, almost identical to Windows 2016 and 2012 R2 versions.
Below is the first screen without VirtualBox guest additions. You can see the space between the console and Windows 2019 virtual machine desktop because no guest additions were installed hence the auto-size of the display is not working.
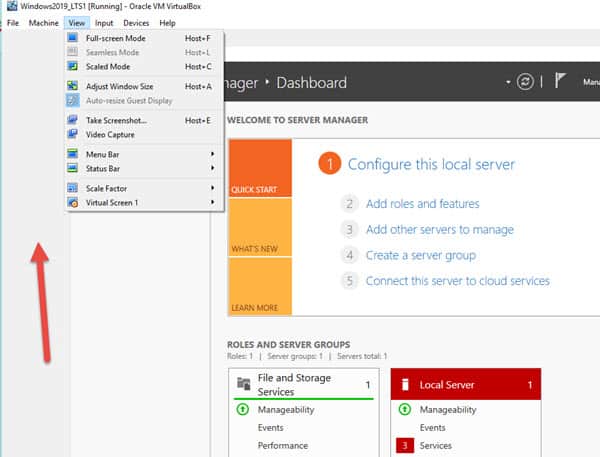
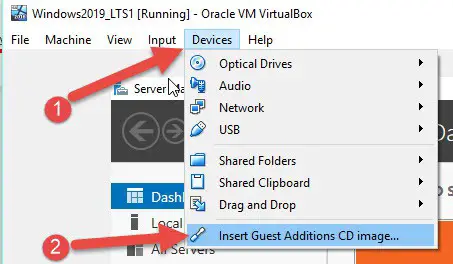
11. Click on Devices and mount the guest additions as shown below.
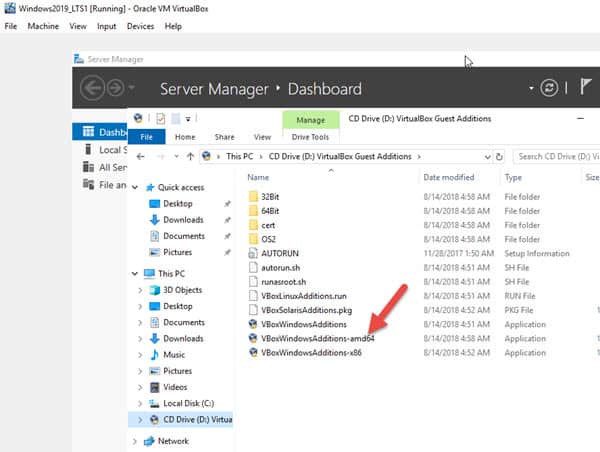
 12. It will be the DVD inside the VM. Open it and execute the 64-bit version (even you can execute the normal one which will detect the OS and install the appropriate version).
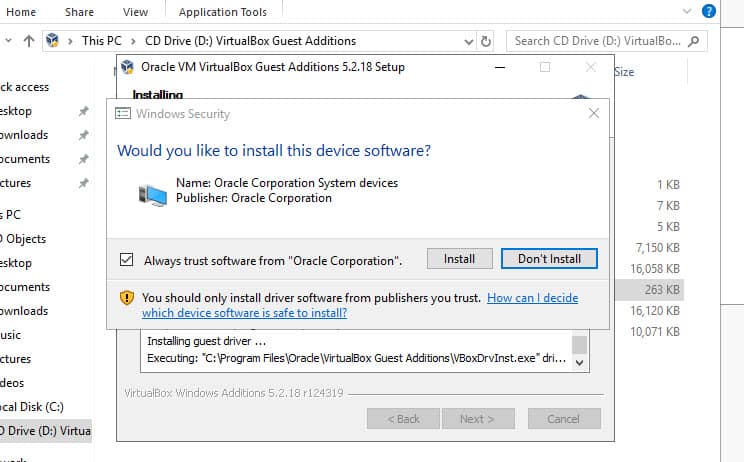
 13. Click yes to install if the warning comes as not a trusted driver.
 14. Reboot the VM after completion.
15. Once it is rebooted and logged in, you will see a better display, mouse integration and performance enhancement inside the VM. Also, the auto display re-size will work fine.
Take a snapshot before you make any changes from this point.
There you go, you have both versions of the Windows 2019 server (LTSC and SAC) on your Windows 10 desktop or laptop by using Oracle VirtualBox. I hope this guide is useful for the testing or demo lab setup at home/office.

![[Fixed] Windows Update Stuck at 0% on Server 2016/2019/2022](https://www.sysprobs.com/wp-content/uploads/2019/04/Downloading-update-stuck-211x150.png)


This site is awesome! Thank you very much for the tools and great articles!!!!