After several days of attempts and findings, finally, I managed to install Mac OS X Snow Leopard on VirtualBox with my Windows OS PC. We are going to use the original OS medium for this installation purpose. That will give the freedom to have the vanilla kernel and possible software updates from the official Apple website.
This method is completely for testing and learning purposes. Please buy the original Mac OS and Apple hardware. From version 3.2, the Oracle VirtualBox officially supports Mac OS X as the guest virtual machine on Apple hardware. So, technically you can virtualize macOS on Apple devices only. But still, we can do some workarounds to install Mac OS X on non-Apple hardware with different bootloaders on Windows computers.
Note: This post was originally published in the year 2010. You may find the older version of products on the screenshots. But still, these methods are applicable for the latest version including Windows 10 and VirtualBox 6 x. But there will not be many valid reasons to try an older version of Mac OS 10.6 when we have macOS 11.0 Big Sur now. If you are a developer who wants to test several older versions of macOS, then you can try these methods.
Requirements
- Oracle VirtualBox
- Mac OS X 10. 6 Snow Leopard Retail DVD or ISO (You may need to search for ISO on the Internet)
- EmpireEFIv1085.iso for Intel Processors (This is the boot loader we will be using to boot Mac OS DVD/ISO, download the correct version here)
- Hardware VT Checker (Read more here and make sure Hardware Virtualization is enabled on the host computer BIOS)
- Sound driver (Mentioned under sound)
Installation Steps of Mac OS X 10.6 on VirtualBox
1) Create a Mac OS X Virtual Machine with the following configuration (If you have the latest VB, then select Mac Server version)
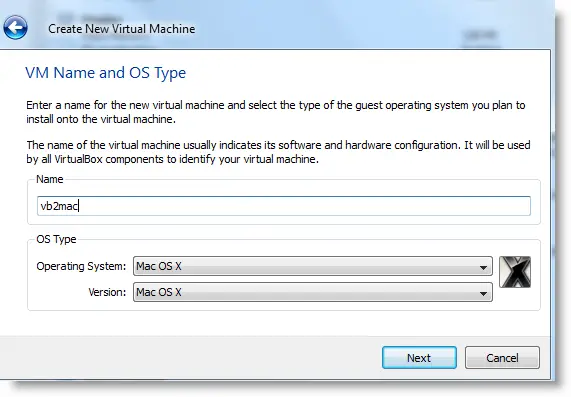
Memory – Minimum 1GB
Processor Cores – 1 or more (Change it to one core if you face any issues. Two cores worked for me)
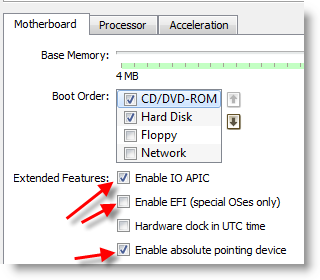
Enable PAE/NX, VT-x,
Nesting Page – Enabled
Enable IO APIC and Enable Absolute pointing device.
Remove Enable EFI. Built-in EFI loader may work with Apple hardware only.
Enable 3D Acceleration under the display and set up maximum video memory.
Storage Controller type ICH6 and create a 20 GB Hard disk.
2) Mount empireEFIv1085.iso to CD drive. Make CD ROM the first bootable device. Keep your Snow Leopard DVD or ISO file ready.
3) Start the virtual machine. When the following screen appears, eject bootloader ISO and load Mac installation DVD or ISO.
To do it, right-click on CD drive and select drive or ISO image. Wait for a while and press F5 then ENTER key when DVD loaded.
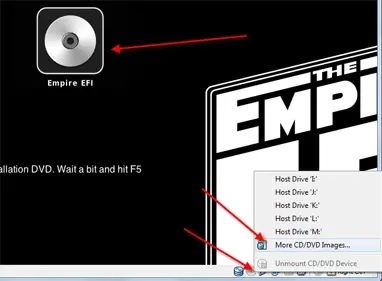
4) Wait for some time. If you see the installation screen, you are almost done. Go through the installation process.
Go to disk utility and create a partition if you can’t see the installation disk.
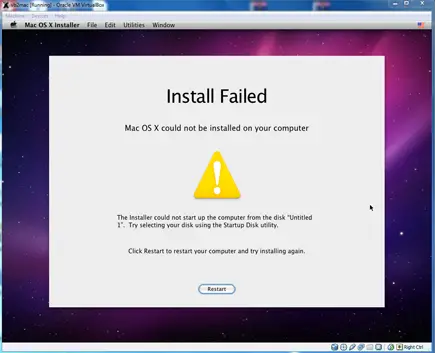
5) I got the following warning message at the end of the installation. It’s not an issue, just restart the Virtual machine.
Note – Shutdown or Restart will not happen normally, you have to do it manually from the VirtualBox console. You have to load the empireEFI ISO again to boot the OS from the installed hard disk.
6) This time, select Mac OS hard disk by right arrow key and press Enter to boot. I’m sure after several initial configurations you will land on the Snow Leopard desktop successfully.
Let’s Fix Some Issues on Snow Leopard Virtual Machine
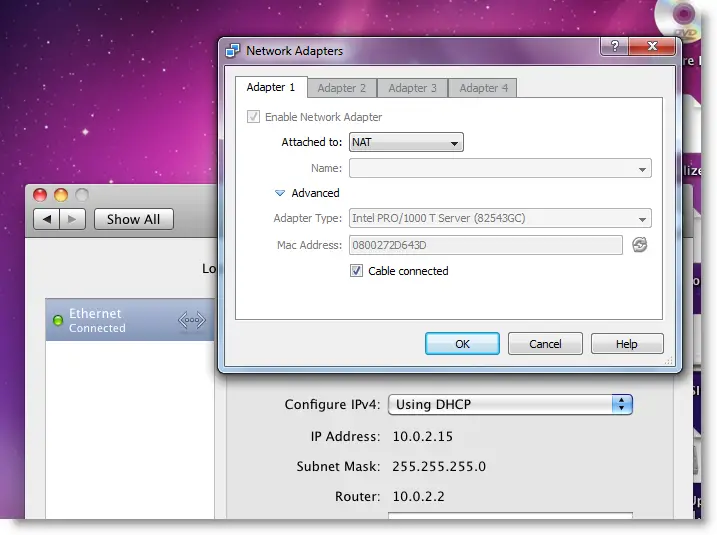
1) Network worked straight away. NAT and Bridged type worked without any patches.
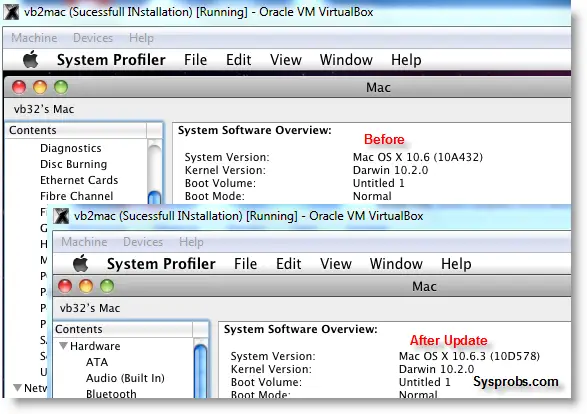
2) Software Update: Yes, it worked. Since we used the vanilla kernel, this VM can be updated. I managed to update till 10.6.4.
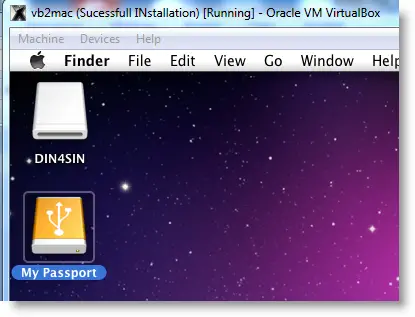
3) USB Support: It worked well. Somehow data transfer is slow but manageable. It detected my USB hard disk and flash drive.
4) The sound in Mac OS X Guest: Sound is a little issue here but worked. I’m sure it will not bother you much.
Follow these steps to install sound drivers. For me it worked, one side speaker worked with little distraction. Something is better than nothing. You need to follow this guide to install sound drivers.

5) Screen Resolution and Screen Size: Follow these steps to adjust the screen size. Widescreen size didn’t work for some users.
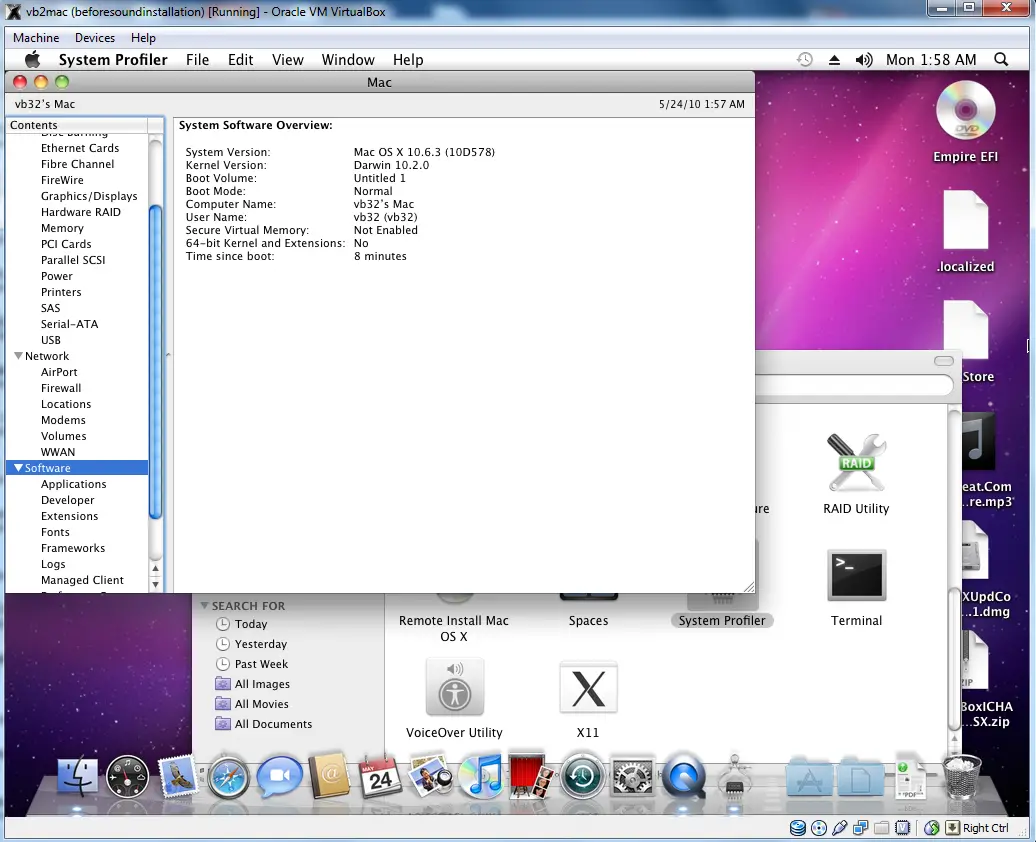
6) Shutdown and Restart: We can’t shut down or restart Mac VM in a normal way. You may see the messages ‘CPU halted’ (for Shutdown) or ‘MACH Reboot’ (for restart), this means nothing will happen after it. We need to power off or reset the virtual machine from the VirtualBox console. Here is the working Snow Leopard on VirtualBox.
7) Update 1
Install Boot Loader permanently and some fixes
To avoid attaching empireEFI ISO every time to boot OS X virtual machine, we can install bootloader permanently on Mac hard disk. This method will install the Chameleon bootloader and some other drivers.
Go to Empire EFI CD which is already mounted and open the Post Installation folder. Take a snapshot before doing anything at this point. Run myHack Installer Package.
Select Customize in Installation Type.

Read each package description and select it if you need it for your computer hardware. I recommend not deselecting anything selected by default. Press the Install button to continue.

After successful installation, remove empireEFI ISO and start the virtual machine, it should boot from the hard disk as shown below.

If this doesn’t work, restore the virtual machine to the latest snapshot and install the Chameleon bootloader from a separate installation file in the Post Installation folder. This might fix the boot loader issue and improve performance.
8) Some fixes for booting issues
a) Mac DVD reading error – EBIOS read error: Error 0×0c Block 0×1ed48a Sectors 0
This is due to accessing data from a Mac retail DVD. Convert the DVD with some cloning software to ISO. Most people faced this issue and that was the solution.
b) Booting errors after installation.
Try Boot verbose or Boot Ignore Caches options. In the empireEFI bootloader, go to Mac disk by pressing the right arrow key. Once it’s selected, press the down arrow key which will bring more options. Select and press Enter.

c) Change boot loader for old type of processors: Select legacyempire_efi1085.iso, which is inside the same folder.
If this bootloader and method didn’t work on the Intel processor then try this method with a different iboot loader.
I hope these methods will be helpful to install the original Mac OS 10.6 Snow Leopard on Oracle VirtualBox with your Windows 10 or 8.1 computer. I mentioned a few troubleshooting steps which may be helpful as well.




Great work frnd………………….. worked great i like it thnx………………………………………..
My processor does not support VT. So is it possible that I can install snow leopard as a virtual machine?
i have a 64bit version of windows7 and a new i7 with asus p8z77-v motherboard and 8 gis of ram, and a 2 tb hard drive will this work on the 64bit version or just 32bit version?
Hi Glynn,
I am running it on win7 64bit. It works for me.
My mouse is disappearing when i right click the disk image. How can that be fixed?
Thank you so much for this guide on how to install MAC OS snow leopard on a virtual machine. I was kind of getting up on hope on the idea on how to do this. And when I download the EFI Boot loader for AMD processor. Will I have a 369WM-2000 HP with 2CORES and AMD 1.65 GHz and 4.0GB of Ram. Thanks again:)
I was getting the EBIOS read error when switching to the physical Mac OS X DVD in the bootloader, and found that selecting ‘passthrough’ in the Storage settings for the VM fixed it.
I cant enable 3D acceleration
If i do it will fail to boot.
AMD Phenom II (x4)
Windows 7 64bit
Tried the install a few times and then read your instructions slowly, and then everything worked. Not keen to have a Mac, but wanted to demonstrate to a few ‘Mac Freaks’ a Mac caged inside Windows. But on the upside, I can now get to know Mac and am in a position to consider the alternative economically. Thanks.
JUst wanna say thanks for your tutorial. Following your instructions to the tee, I was able to install and run Mac OSX on my Virtual Box and it happened EXACTLY how you have it pictured here but after configuring, It runs flawlessly. Thanks again
oh and I used the AMD Bootloader (Empire EFI4)