This guide will be showing you how to install the latest Fedora 30/29 with working VMware shared folders on Windows 10 host. Using the latest Linux version without rebooting between Operating Systems and modifying the boot loader on the physical hard disk gives a great advantage for computer users. Thanks to the virtualization software like VMware Workstation and VirtualBox.
As Fedora is one of the best and free Linux distribution, using it with Windows 10 simultaneously can enable us to have Windows and Linux environment on the same computer.
Steps to Download and Install Latest Fedora 30/29 on VMware
1) Visit the official site and download the latest ISO file.
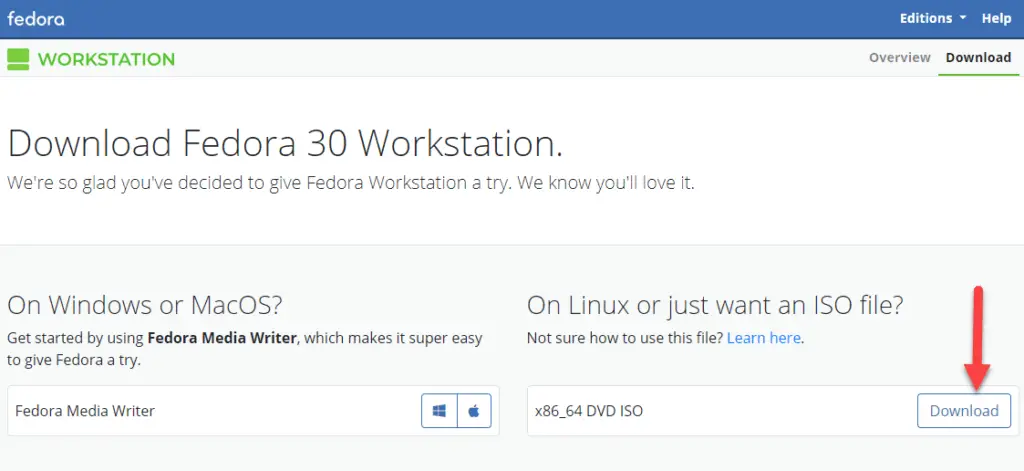
2) Once the file downloaded, create a new virtual machine. Leave the Typical (Recommended) option.
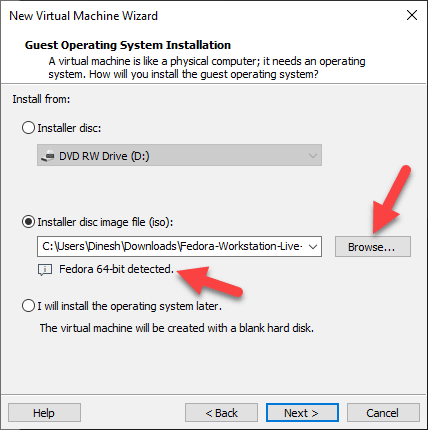
3) Browse the ISO file you have downloaded. VMware will detect the OS automatically.
4) Give a name for VM and select the location for it. Make sure it has enough space to include the virtual machine snapshot and disk files.
5) Set minimum 40 GB disk space and store the disk as a single file.
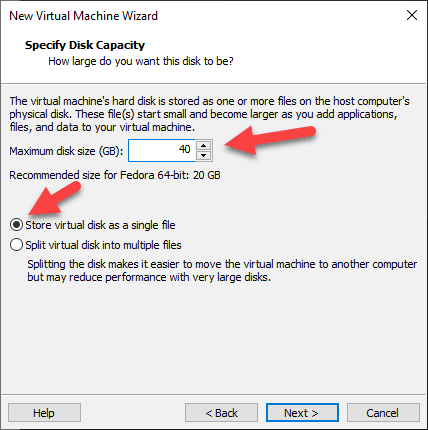
6) In the next screen, customize the settings: set minimum 2GB RAM and 2 processor cores for better performance. If your physical computer has resources, allocate more for VM.
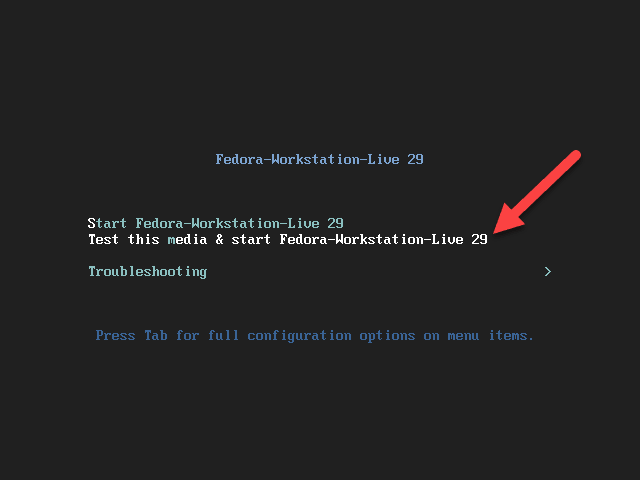
7) Power-on the VM and select ‘Test this media & Start Fedora’ option as below to start the installation.
8) Select ‘Install to Hard Drive,’ your language, and automatic storage configuration is the simple and easy method to create partitions.
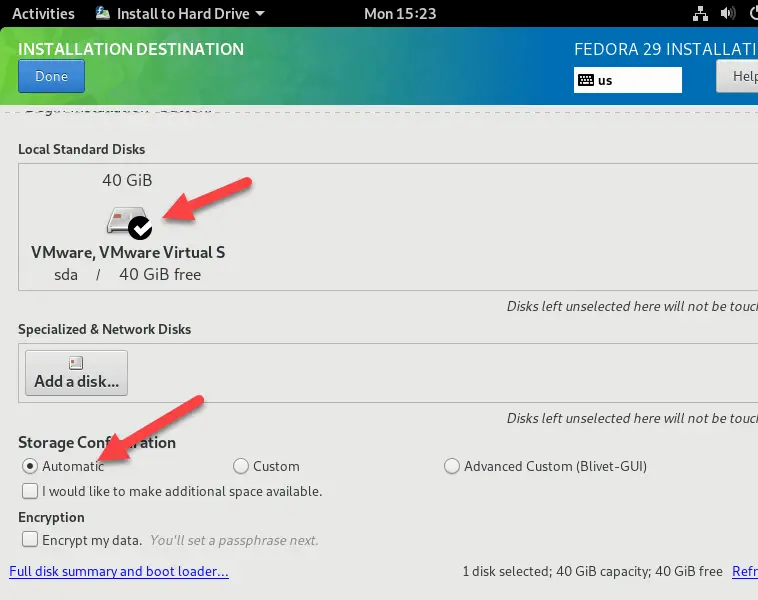
9) Press ‘Done’ and begin the installation.
10) After installation completed successfully, restart the virtual machine. Make sure to click on ‘I Finished Installing’ at the bottom on VMware window- that will eject the ISO file from the CD drive of VM. Otherwise, when you restart the VM, it will boot from ISO again (not from the hard disk).
11) Do the initial setup, including creating a user account.
Now you should have a nice working Fedora 30/29 on the VMware Workstation.
VMware Tools Installation for Fedora 29/30 on Windows 10
Most of the recent Linux distributions have the VMware and other virtualization add-ons and tools pre-installed. Once it detects the platform during the OS installation, VMware tools installed by itself.
No manual installation of VMware tools required for Fedora 29/30.
How to verify that the VMware tools are installed and we got the additional features?
- You will see that VM is working smoothly without any display lags or issues.
- Full screen (Menu-> View) option is enabled, and you can enter the full-screen mode easily. Full-screen option for a VM usually become active once the VMware tools installed properly.
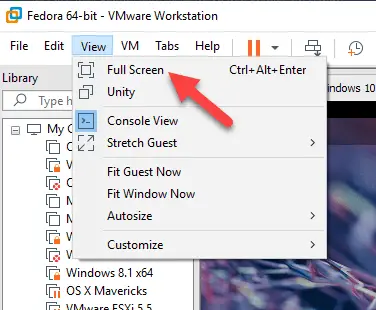
- VMware tools installation shows as ‘Reinstall’, not ‘Install’, that indicates the existing and working VMware tools.
Setup VMware Shared Folders in Fedora 29/30 with Windows 10 Host
Before proceeding to any steps further, I recommend taking a snapshot of the VM.
The shared folder can be enabled while the VM is working.
12) Go to the settings of the Virtual machine, then select options.
13) Under ‘Shared folders’ enable the feature and add the folder you like to share between Fedora 29/30 and Windows 10 computer.
14) Select the folder path and give a name which will be used inside the Fedora virtual machine.
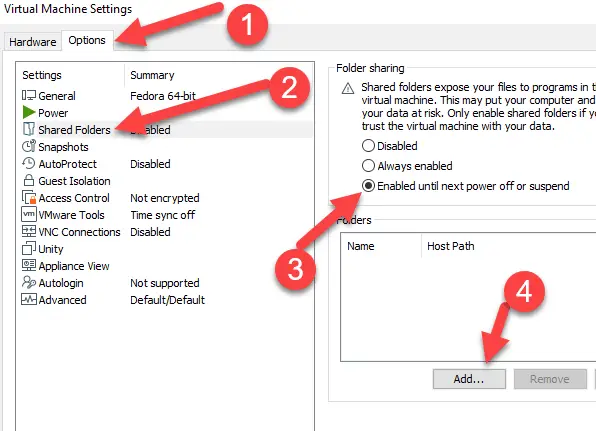
15) Enable the share on the next screen. If the folder is so important, enable the ‘Read-only’, otherwise go with the default option.
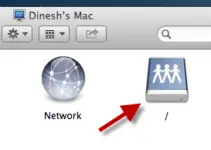
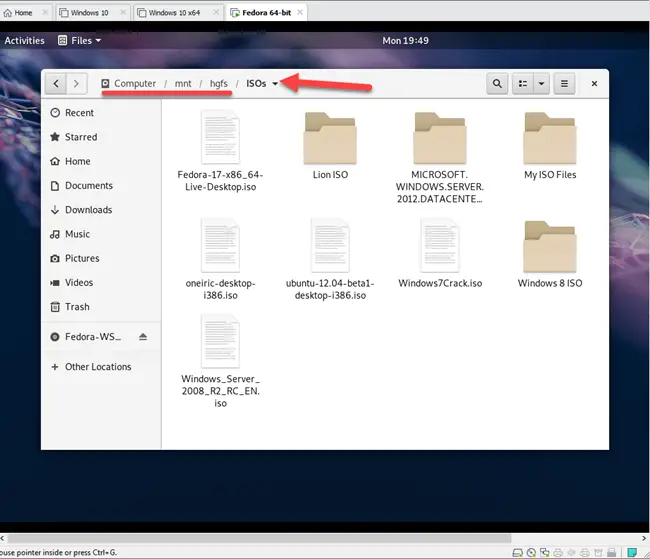
16) Inside the VM, open ‘Computer’ or file system to access /mnt folder. Inside that, you will find hgfs folder that will have the VMware shared folder from Windows 10.
Here are the path and my working shared folder from Windows 10 host computer.
I’m sure this simple guide is useful in installing Fedora 30 on VMware workstation and setting up the shared folders between Linux guest and Windows 10 host.


![[Guide] How to Merge Snapshots in VMware Workstation?](https://www.sysprobs.com/wp-content/uploads/2010/09/p2v-in-virtualbox-by-disk2vhd-211x150.png)

