VMware and VirtualBox made Hackintosh easy by allowing us to use them simultaneously as a virtual machine on the same host computer. In this post, we will talk about how to use the preinstalled VMware image of OS X 10.8 on a Windows OS physical computer.
The preinstalled image and Torrent file we talk about in this article was created by a separate team called souldevteam back in the year 2012. Unoftuntily, the website and team are not active anymore to download the file from their website. Mountain Lion OS X is an outdated Apple OS. There are many other latest versions available, we covered them here. It is highly recommended to use the latest releases except you have some special requirements to test the OS X 10.8 currently.
This method is completely for testing and learning purposes only.
Prerequisites to Use OS X10.8 Mountain VMware Image on Windows
1) Hardware Virtualization Technology (VT) enabled processor. Most of the recent computers support these features built-in.
2) Pre-installed VMware image with a few tools. VMware unlocker and darwin.iso are important.
3) Latest VMware workstation.
Steps to Follow
1) Download ‘Mountain Lion 10.8 Retail VMware Image’ by souldevteam – It is a torrent file, so search for this file from your favourite search engine.
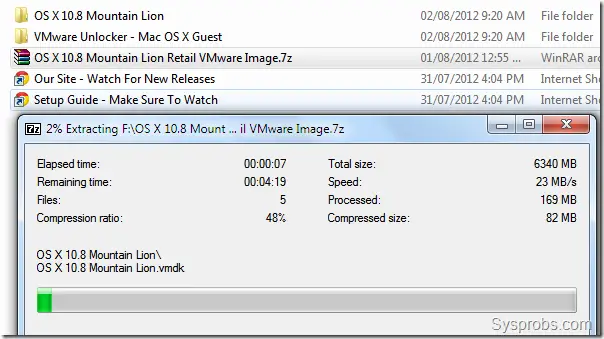
2) Use the 7z program to unzip it. After extraction, the size should be around 6.2 GB
3) Check and make sure your physical computer supports Hardware Virtualization Technology (VT).
4) Use the VMware unlocker, which is available with downloads to patch the existing VMware workstation application. Use the correct version of unlocker. Read more about how to use VMware unlocker to get mac OS guest support.
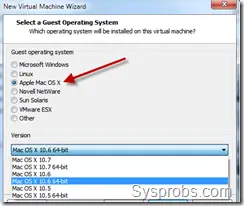
After the patch, ensure that you are getting the Apple Mac OS X option as shown below.
5) Once step 3 and 4 are succeeded, open ‘OS X 10.8 Mountain Lion.vmx’ from extracted location through VMware workstation ‘File –> Open’ menu.
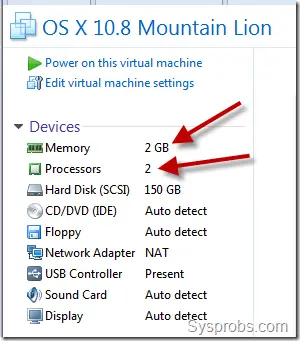
6) That should open the pre-installed Mountain Lion virtual machine configuration. Before powering it on, you can modify the processor and RAM settings depending on available hardware resources. I increased the RAM size to 2GB and the number of processor cores to 2 since I had core2duo physical processor.
7) Power on the virtual machine now. If all settings are correct, the Mac OS X 10.8 virtual machine will start with the initial setup screen as shown below.
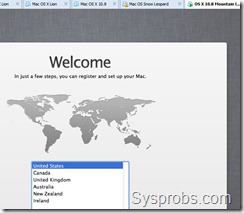 After completing the initial configurations, you should land on the mountain lion OS X desktop without any issues.
I recommend taking a snapshot now before proceeding further.
Install VMware Tools on Mac OS X 10.8
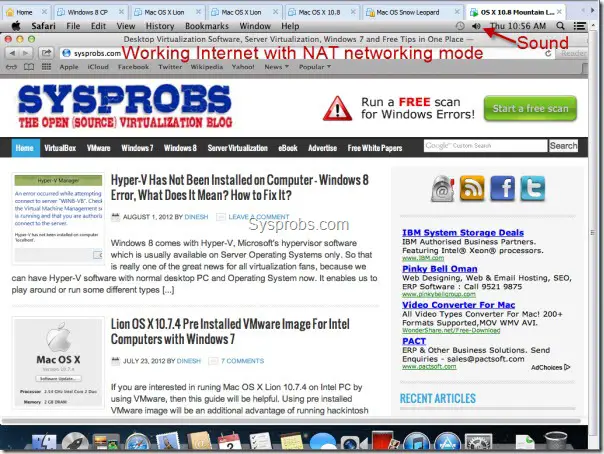
Network and sound/audio worked out of the box without additional installations or settings.
To get more screen resolutions, VMware shared folders and slightly better performance, we need to install VMware tools.
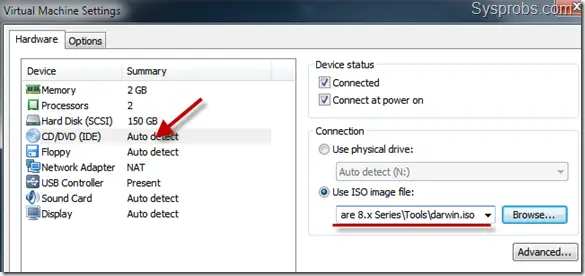
8) Browse and load the darwin.iso file to the virtual machine’s CD/DVD drive. Darwin.iso is located at the same extracted place.
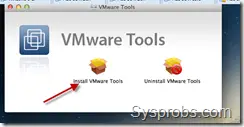
Once it is loaded to CD/DVD drive, the virtual machine will automatically detect open the content as below.
Double click and execute the ‘Install VMware Tools’ application. You may need to enter your password and select the disk to continue the installation.
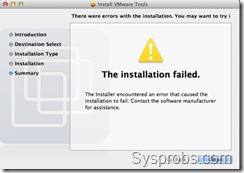
For some reason, VMware tools installation failed on the Mountain Lion virtual machine, but nothing to worry about it. Press close and restart the virtual machine manually.
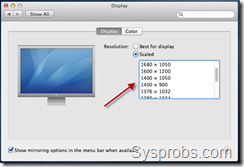
9) After the virtual machine is restarted, you will find more screen resolutions under display settings. Also, the full-screen mode (from the VMware menu bar) will work now.
VMware Shared Folders on Mountain Lion 10.8 and Windows OS
If you like to transfer files between Mac OS X guest and Windows hosts frequently without any types of networking connectivity or sharing, then you can use VMware shared folders feature. This will work only after VMware tools installation.
You can access specific folders or partitions of Windows 7 (or 10/8.1) host OS through VMware shared folders from guest VM. That will enable the data to transfer back and forth easily without setting up a network or any shares.
To configure VMware shared folders, go to the virtual machine’s settings and enable folder sharing. Then, add the partition or folder of the Windows host.
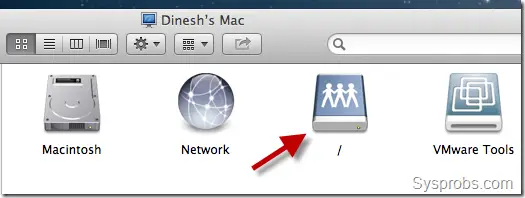
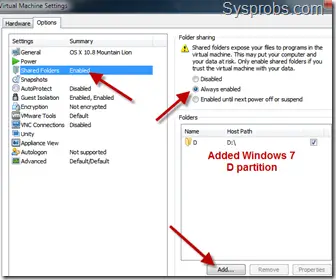 Wait for a few minutes to mount this drive or folder inside Mountain Lion virtual machine.
You will find a new drive under the computer on Mac OS X. By opening the drive you can access Windows OS files and folders from Mac OS.
 Depending on the mode you selected (whether read-only or write access), you can save the data too.
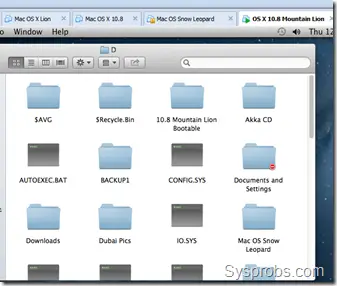 This is the fast and easy method to transfer files and folders between Mac OS X 10.8 guest and Windows host machines. I hope this guide is helpful to find out how to use the pre-installed VMware image of Mac OS X 10.8 Mountain Lion on a Windows Operating System.




I’m pretty sure you need 64 bit.
Mac is x64 not 32
I can’t get 10.8.3 to work with an AMD E-450 CPU, which supports AMD hardware based virtualization, and X64. It starts up, and just sits on the Apple logo, with a grey screen. The host Operating system is Windows 7 professional X64 with Vmware Workstation 8.06, however the original 10.4.3 Virtual Machine that I made back in 2005 runs on it.
I have win 7 64 bit
I am running Windows 7 32 bit, but my processor supports 64 Virtualization mode (checked it)
How can It be ?
Almost all Core 2 Duo or newer Intel CPU’s support 64bit virtualization. Even if the version of Windows you are running does not take advantage of that capability, it’s still there.
Choppy sound.
Mods to .vmx file.
You may get differeing results.
=======================
sound.highPriority = TRUE
usb.present = “TRUE”
ehci.present = “TRUE”
sound.present = “TRUE”
sound.virtualDev = “es1371”
sound.fileName = “Speakers (Conexant CX20671 SmartAudio HD)”
sound.autodetect = “FALSE”
===================================
FYI this does not work with ESXi. I’ve tried multiple times to get it to work. It simply doesn’t though. Something about incompatible drives.
I cant seem to sign in with iMessage… anyone else get that working?
No, cant get it working either. Can’t see what the problem could be either unless its some sort of network related thing?
iMessage on Mountain Liion, Can’t get this baby to work. Here’s the problem.
iMessage checks the System Serial Number – if it’s not a VALID apple device number, iMessage won’t work.
and guess what – it’s not a valid number. This is the number shown by System Information.
System Serial Number: VMWVk3VS65lFQP5LgB7iOnenA
Not a valid Device Serial Number,
not to be confused with the Hardware UUID.
00000000-0000-1000-8000-000C29DEEDFD
.
There is a boot loader called Chameleon that is supposed to fix this – but it doesn’t make the slightest difference.
So – if anyone has made any headway on this, it’s be interesting.
The other nice thing would be to be able to fix the sound – properly.
There is a iMessage enabler on the Dev´s website…
http://www.souldevteam.net/blog/downloads/
iMessage.
Still searching for a solution. It may be an impossible task.
Firstly, this is an example of a valid Serial Number:
Serial Number: C02CV046DV7P
If you enter it into this web form, you will see a lot of information about the actual computer it belongs to.
http://www.appleserialnumberinfo.com/Desktop/index.php
I then found this on a forum …
https://discussions.apple.com/message/1003263?messageID=1003263&%3b#1003263
and …
After spending ages fiddling with this, it still makes no difference.
==================
Then:
1) Enable Root User, using NetInfo Manager (in the Utilities folder), menu Security.
2) Navigate to /System/Library/CoreServices/loginwindow.app/Contents/Resources/English.lproj, and open “AboutThisMac.strings” with Property List Editor (in /Developer/Applications/Utilities).
3) Find the parameter ABOUTBOX_SERIAL_NUMBER_FORMATSTRING; the value will be “Serial Number %@”; Replace %@ with your serial number and save/close/quit Property List Editor.
4) Use NetInfo Manager again to disable root user.
Act carefully with this one, don’t touch anything else, and don’t forget to disable root user when you are done.
=================================
I don’t think it really matters what is in that list.
NOW. The question really is. Where is this VMWare image getting it’s Serial Number from???? Is it coming from the hardware I am running it on?
If you run your VM-Mac, and on the Apple icon, top left, click on About This Mac, then System Information, you will see your Serial Number. But it will be invalid.
and – where ever the Serial Number is coming from – can we change it within the VM files or not????
Ok, I don’t think the above works on the latest VM.
Nor do the instructions from the link at the top of this blog – from the Souldev team.
I can find NOTHING that will make the latest – 10.8.3, with VMWorksation on x64 Win8, work.
Sorry for the amount of traffic folks. I guess I can live without iMessage anyway. 🙂
This was about the iMessage. Stil lcan’t get it working.
Has anyone managed to get the onboard video camera working on a laptop?
YES. Woo Hoo. Onboard camera working on my Toshiba + Win 8 + OS X 10.8 Mountain Lion. and VMWorkstation 9.
How To.
Start VMWorkstation.
Do not start the Guest OS
Go to the tab along the top that says VM
Click on Removable Devices
— if you have an onboard camera – as I do on the toshiba laptop –
click on Importec USB camera. It will then tell you that each time the VM starts, it wil ldisconnect the camera from the host. OK, continue.
Close the VMWorkstation, then start it up again, then the Mac OSX, and test it by starting PhotoBooth.
It should work – unless you have some sort of strange arrangement.
Try to use Virtual Box instead of VMWorkstation. It’s kinda bit slow !! Trust me. If you have a fast machine VM Workstation is good but Virtual Box is more for an instance !! hehe
hmm. YAP. (Yet another problem)
Can’t seem to play movie trailers in iTunes. Sound – but just a black screen.
Hi,
running mountain lion 64 VMware 9 on xw8400 win7x64
so far so good Thanks!
the shared folder appears on desktop at start
than quickly disappears any fix for this?
TIA
Does anyone know the location and name of the boot files for this Mac version? And how to change them.
I have found
/Library/Preferences/SystemConfiguration
and
/Extra
which contain things like
/Library/Preferences/SystemConfiguration/org.chameleon.boot.plist
and
/Extra/org.chameleon.boot.plist < which should be a link to the one above – but isn't.
/Extra/smbios.plist
Modifying these files with Lizard, should change what AboutMyMac sees, but it's not doing it.
Is there an expert on this board who does know where it's all at.
This is the closest I have managed to get to being able to set the serial number. The tutorial is here.
http://www.techosx86.com/2012/02/call-her-what-you-want.html
cheers
Robert
It seems I’m on a false trail anyway I think. This type of install, that is, running as a VMWare machine under VM Workstation, means that the Mac is booted by means other than anything that will read SMBios.plist, or the com.apple.Boot.plist files.
I am unable to discover how it actually does start up the mac. But, there are two files that it uses, config.ini and preferences.ini. Maybe they can be tweeked to reflect a startup scene that will read the SMBios files. Or something can.
However – this is also probably the wrong Blog to be asking, as apart from about one post a month – I appear to be the only one reading this.
Unlocker 7.1.x Series for Player (5.0.2) doesn’t work.
Output is:
VMware Authorization Service wurde erfolgreich beendet.
—–
Mac OS X guest unlocker for VMware, version 7
Directory C:\Program Files (x86)\VMware\VMware Player\\\\\\x64:
File vmware-vmx.exe:
Unlocking Mac OS X guest on non-Mac host …
Unlocking Mac OS X Client guest (method 0) …
File vmware-vmx-debug.exe: Missing file.
File vmware-vmx-stats.exe: Missing file.
File C:\Program Files (x86)\VMware\VMware Player\\\\\\vmwarebase.dll:
Error opening file.
—–
VMware Authorization Service wird gestartet.
VMware Authorization Service wurde erfolgreich gestartet.
any suggestions? Thx!
I have the same problem with VMware Player 5.0.2.
Are you in Administrator mode, in the CMD mode, (if in DOS) and in the directory where the VMWare binaries are?
You have to be in DOS mode
C:\>
Mac OSX 10.8.4, after update from Check for Updates
1.
iMessage will not work. There are some patches on the Soludev site, but very mixed results. Mostly it just crashes. The problem is, that iMessage needs to see a valid Apple Mac serial number. And it doesn’t on this setup. You can check this under “About My Mac”, and various links I have been looking at on earlier posts. Nothing I have done so far will get it to swap in a genuine serial number. The Souldev site has moved things around a bit. Everything downloadable is available here. http://www.souldevteam.net/blog/downloads/
If you are successful with the imessage patch, great. I can’t get it to work, it just crashes my system.
2.
I have video working with the native apps, like PhotoBooth, BUT – with Skype, iTunes, VLC, YouTube etc etc, I have sound, but only a black video display port. Where there should be a video, there is only a black square. I can not discover how to fix this yet. My system has a built in webcam – Toshiba Laptop L630, and the camera works – except in Skype.
3.
Sound remains very patchy. I’m pretty sure it’s caused by latency in transfering it to the host system. Not sure but haven’t looked much at fixing it yet.
4. I have the original VMTools installed – but after upgrading my VMWorkstation to V9 (legal copy) I think I may have broken something – although everything seems to still work. Not too sure what VMTools does in total yet.
Needed: Fix for the video thing problem, and some way of patching that pesky iMessaage thing.
well, I didnt reach the cdrom from guest, but I just download darwin iso in mac os x, and mount it, then i was able to install vmware tools!
http://softwareupdate.vmware.com/cds/vmw-desktop/fusion/5.0.1/825449/packages/ to get darwin.iso
Thanks a heap for that, mate!
Hi ! i have installed the mountain lion 10.8 vmware on windows 8 as host machine . and it works fine….ethernet drivers also work fine …but i was unable to install xcode 4.5 on it ….kindly help me with this…my main motive to run mac virtual machine was to learn iOS apps development …so please help me achieve this goal ….
In my not start the launchpad help me
It looks like VMWareTools install for this latest package has the LogmeIn plugin as part of the package?
Trying to get this work on vmware. It keeps freezing on me at the installation screen. It wont go past that. My computer has i7 3770k if that matters. Any ideas?
i install that and it was working perfectly but some how now it doesnt grab my input like mouse and keyboard doesnt work!
what can i do?
Thanks, works perfectly on my PC…