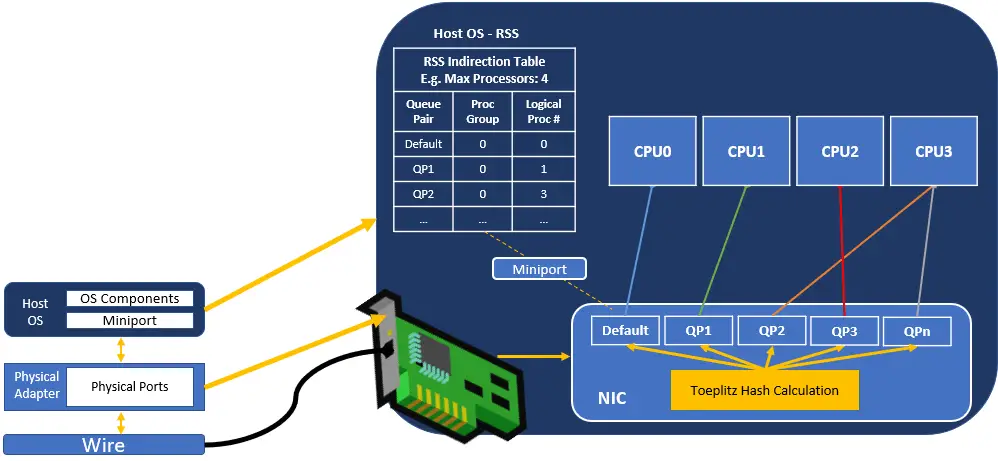
Update: This method is still applicable for the latest Windows 2019/2022 Hyper-V servers if the physical network cards on the host do not support the VMQ feature. By default, once you install the Windows Hyper-V role on a server, the VMQ feature will be enabled. If the physical NIC does not support (it is a hardware feature) VMQ, then it is going to slow down the network inside the virtual machines.
Microsoft says that there are particular NICs and manufacturers got affected by this feature. The Windows driver update could fix the issue, but if it doesn’t work, follow this guide to disable the VMQ feature. It can solve the very slow network performance inside Windows 2012 R2/2016/2019 Hyper-V guest virtual machines.
I installed and configured Windows 2012 R2 Hyper-V on a 3 node cluster with Dell R620 physical servers. Installation went smoothly and most of the configuration was done based on Windows 2012 R2 Hyper-V best practice checklist from the Microsoft blog. During the initial testing time, I noticed a very slow network performance inside the virtual machine guest OS. The below method helped me to solve the issue and bring back the network speed to normal in Windows 2012 R2 Hyper-V server.
The Dell R620 server came with 4 numbers of Gigabit network adapters. I used Windows 2012 R2 software-based teaming to team two physical NICs. Then created an external virtual switch in Hyper-V manager with the teamed network adapter. The network performance in the host server through the teamed network worked well, but it was painfully slow inside the guest VMs.
Though there are several solutions and suggestions available on the Internet to fix it, the VMQ technique worked for me. After disabling VMQ on physical NICs, the network performance inside virtual machines started performing well. VMQ is one of the great features to efficiently use network traffic if the host server NIC supports the VMQ feature.
Read Also: Download and use the latest Windows Server VHD on VirtualBox and VMware
If the server hardware (NIC) doesn’t support the VMQ feature, it is better to disable it before deploying virtual machines in production.
How to Disable VMQ on Hyper-V
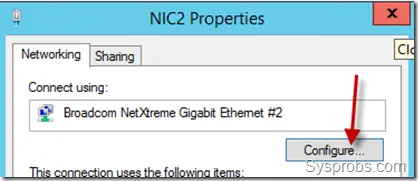
1) Open properties of the physical network card on the server, and select Configure.
2) On the Advanced tab, select Virtual Machine Queues (VMQ) and disable it as shown below.
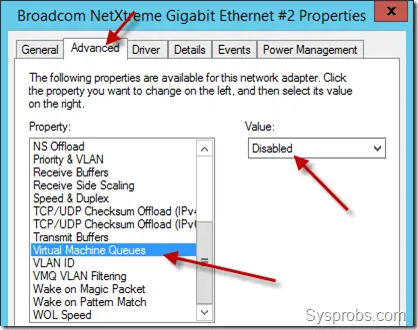 You can disable it on all physical network cards because there is no point in keeping it enabled if the hardware doesn’t support the feature.
It is recommended to restart the host server after making these changes. I’m sure the network performance of virtual machines on Windows 2012 R2/2016 Hyper-V will be back to normal speed.
You can refer to the specification sheet of the network card to verify the VMQ support for Hyper-V. If it is officially supported, probably you will not face this slowness issue. Instead, the NIC, VMQ, and Hyper-V will manage the network traffic very well with all featured combined.





Thank you – Banging my head for days on my lab. Noticed performance right away.
Just to let you know this worked for me 100%. I didn’t even reboot the server. I have 4 NIC’s and a 36TB Dual Processor beast. The throughput was slower than my old server.
Once I did the change. Voilla! Super fast and blazing.
Thanks so much!!
Yes, Its working fine now. Thanks